
Image Source: www.isinwheel.com
Step-by-Step: How to Remove an E-Bike Battery Safely
Can you remove an e-bike battery? Yes, you can and should remove your e-bike battery for charging, storage, and maintenance. Detaching your electric bike battery is a straightforward process, but doing it correctly ensures both your safety and the longevity of your battery. This guide will walk you through e-bike battery removal with clear, simple steps.
Why Removing Your E-Bike Battery Matters
Taking your electric bike battery detachment seriously is crucial. It’s not just about convenience; it’s about e-bike battery safety and proper e-bike battery maintenance. Regularly removing your battery allows for easier e-bike battery charging and correct e-bike battery storage. It also helps you inspect the battery for any signs of wear or damage, which is essential for e-bike battery replacement when the time comes. Sometimes, you might need to troubleshoot issues, and that often starts with safely removing the battery.
Preparing for Battery Removal
Before you even think about touching your battery, a little preparation goes a long way. This ensures a smooth and safe e-bike battery removal.
Gathering Your Tools
Most e-bike battery removal doesn’t require many specialized tools. Often, the bike itself comes with what you need.
- Key: Many e-bike batteries are secured with a lock and key. Make sure you have the correct key for your specific e-bike model.
- Soft Cloth: A clean, soft cloth is handy for wiping down the battery and its contacts before reinsertion.
- Gloves (Optional but Recommended): Wearing gloves can help keep the battery clean and protect your hands, especially if the battery has been used for a while.
Finding a Safe Space
Choose a clean, dry, and stable surface to place the battery once it’s removed. Avoid dusty or wet areas.
- Stable Surface: A workbench, a sturdy table, or even a clean floor can work.
- Dry Environment: Moisture can damage electronic components, so ensure the area is dry.
- Out of Reach: If you have small children or pets, ensure the battery is placed where they cannot access it.
Locating Your E-Bike Battery
E-bike batteries are usually mounted in one of a few common places. Knowing where yours is located is the first step in how to take out e-bike battery.
Common Battery Mounting Locations
- Downtube Mount: This is the most common type. The battery slides into a housing that is often integrated into the e-bike’s downtube. It usually looks like a large water bottle.
- Rear Rack Mount: Some e-bikes have the battery integrated into a rear luggage rack.
- Seat Tube Mount: Less common, but some batteries are mounted to the seat tube.
- Integrated into Frame: Newer e-bikes might have batteries that are more seamlessly built into the frame design.
The Step-by-Step Guide to E-Bike Battery Removal
Now, let’s get to the core of how to remove e-bike battery. Follow these steps carefully.
Step 1: Ensure Your E-Bike is Powered Off
This is a critical safety step for e-bike battery safety. Turning off the bike prevents any accidental electrical discharge.
- Locate the Power Button: This is usually on the display unit, the battery itself, or sometimes a separate button on the frame.
- Press and Hold: Follow your e-bike’s manual, but typically, you’ll press and hold the power button until the display turns off completely.
- Check the Display: Ensure all lights and the screen on your e-bike’s console are dark.
Step 2: Unlock the Battery
Most e-bike batteries are secured with a lock to prevent theft and accidental removal while riding.
- Find the Lock Mechanism: This is usually located near where the battery connects to the bike frame.
- Insert the Key: Gently insert the key into the lock cylinder.
- Turn the Key: Turn the key to the unlock position. You might hear a click.
- E-bike Battery Unlock: If you’re having trouble with the e-bike battery unlock mechanism, don’t force it. Check that the key is fully inserted and try a gentle jiggle. If it’s still stiff, a tiny amount of lubricant specifically designed for locks might help, but use it sparingly.
Step 3: Release the Battery Latch/Lock
Once unlocked, there’s usually a mechanism to release the battery from its mount.
- Identify the Release Mechanism: This could be a lever, a button, or sometimes the key itself acts as the release lever.
- Engage the Release: Press or move the release mechanism.
- Hold it in Place: Some designs require you to hold the release mechanism while pulling the battery.
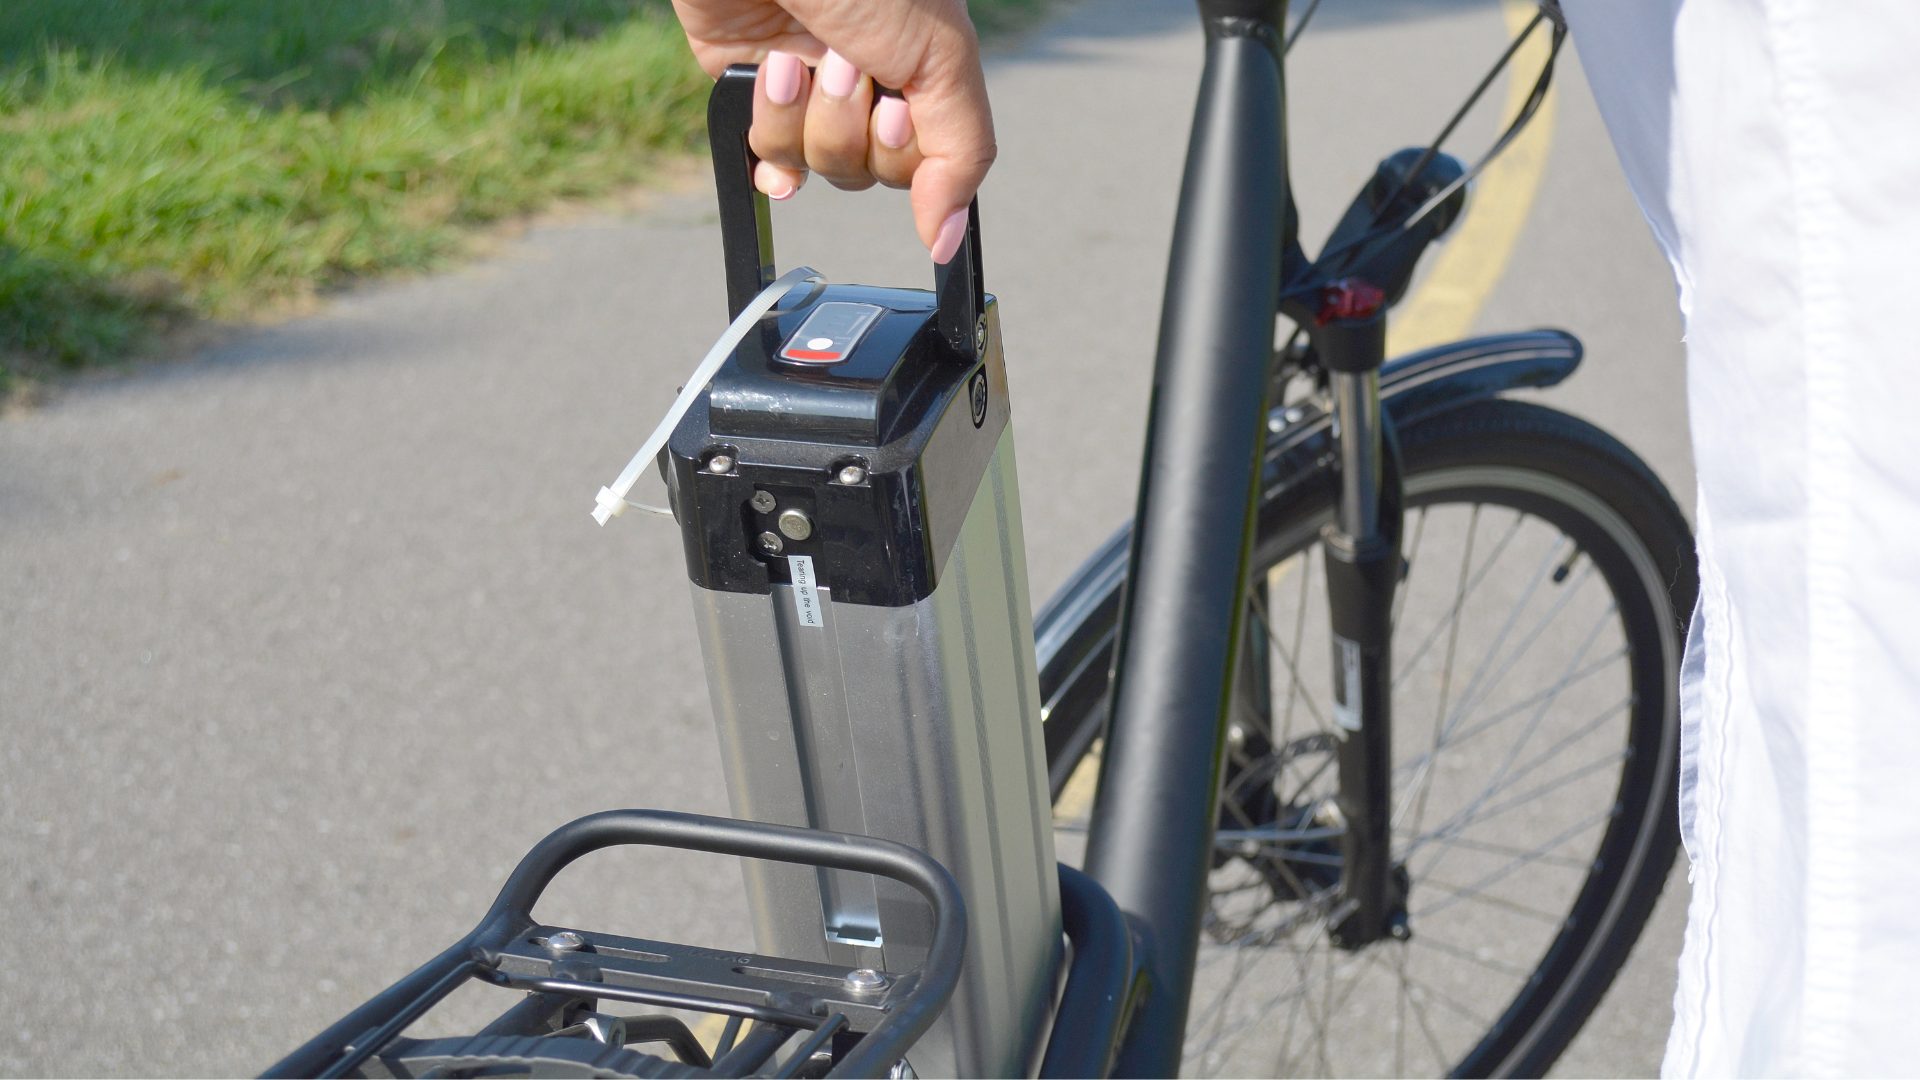
Step 4: Gently Slide or Pull the Battery Out
This is the actual e-bike battery detachment.
- Grasp the Battery: Hold the battery firmly, usually by its designated handle or by the casing itself. Avoid gripping wires.
- Slide or Pull: Gently slide or pull the battery away from its mount. The movement will depend on your bike’s design. Some batteries slide down, some pull straight out, and others pivot.
- Avoid Force: If the battery feels stuck, don’t yank it hard. Double-check that the lock is fully disengaged and the release mechanism is active. Sometimes, a slight wiggle can help.
Step 5: Inspect the Battery and Mount
Once the battery is out, take a moment to examine both the battery and the bike’s mount. This is a key part of e-bike battery maintenance.
- Battery Contacts: Look for any dirt, debris, or corrosion on the battery’s electrical contacts and the corresponding contacts on the bike.
- Battery Casing: Check the battery casing for any cracks, dents, or signs of damage.
- Mounting Bracket: Inspect the bracket on the bike for any bent parts or loose screws.
Step 6: Clean Contacts (If Necessary)
If you notice any dirt on the contacts, a gentle cleaning can improve connection and prevent issues.
- Use a Dry Cloth: A clean, dry, soft cloth is usually sufficient.
- For Stubborn Dirt: If there’s more persistent grime, a cotton swab lightly dampened with isopropyl alcohol (rubbing alcohol) can be used. Ensure the alcohol evaporates completely before reinserting the battery.
- Avoid Harsh Chemicals: Never use solvents or abrasive cleaners on the battery or its contacts.
Step 7: Proper Handling and Storage (If Not Recharging Immediately)
If you’re not immediately putting the battery on to charge, handle it with care.
- Avoid Dropping: Lithium-ion batteries are sensitive. Dropping them can cause internal damage, even if the casing looks intact.
- Protect from Extremes: Keep the battery away from direct sunlight and extreme temperatures (both very hot and very cold).
- Safe Storage Location: Store it in a cool, dry place.
Reinserting the E-Bike Battery
Putting the battery back is the reverse of removal, but requires the same attention to detail.
Step 1: Align the Battery with the Mount
- Orientation: Make sure you’re holding the battery in the correct orientation to fit into the mount. There will be guide rails or specific shapes to ensure correct alignment.
Step 2: Gently Slide or Push the Battery into Place
- Smooth Insertion: Slide or push the battery firmly into the mount until it engages.
- Listen for a Click: You should hear a distinct “click” when the battery is properly seated and locked into place.
Step 3: Secure the Battery with the Lock
- Insert and Turn Key: Reinsert the key into the lock and turn it to the locked position.
- Remove Key: Remove the key and store it safely.
Step 4: Power On and Test
- Turn on the E-bike: Press the power button on your display unit.
- Check the Display: Ensure the battery level indicator is showing a charge and the system powers up normally.
- Gentle Ride Test: If possible, take a short, gentle ride to ensure everything is functioning correctly.
E-Bike Battery Maintenance and Care
Proper e-bike battery maintenance extends the life of your battery and ensures reliable performance. Removing the battery is a key part of this.
Charging Practices
- Follow Manufacturer Guidelines: Always refer to your e-bike’s manual for specific charging instructions.
- Use the Correct Charger: Never use a charger not designed for your specific battery model.
- Avoid Full Discharge: Try not to let the battery drain completely regularly.
- Don’t Overcharge: Modern chargers have safety features, but it’s still best practice to disconnect the battery once fully charged.
- Charging Temperature: Charge the battery in a room-temperature environment. Avoid charging it when it’s very hot or very cold.
Storage Best Practices
Proper e-bike battery storage is essential, especially if you won’t be using your e-bike for an extended period.
- Partial Charge: For long-term storage, aim for a charge level of around 50-70%. Storing a lithium-ion battery fully charged or completely drained can degrade its capacity over time.
- Cool, Dry Place: Store the battery in a cool, dry environment, away from direct sunlight and moisture.
- Temperature Range: Ideal storage temperatures are generally between 10°C and 25°C (50°F and 77°F).
- Keep it Secure: Store the battery in a place where it won’t be accidentally damaged or discharged.
Environmental Considerations
- Recycling: When an e-bike battery reaches the end of its life, it’s crucial to recycle it properly. Lithium-ion batteries contain valuable materials but can also be hazardous if disposed of incorrectly. Many bike shops or local recycling centers accept them.
Troubleshooting Common Issues During Removal
Sometimes, the e-bike battery removal process isn’t perfectly smooth. Here are some common hiccups and how to address them.
Battery Won’t Unlock
- Key Not Turning: Ensure the key is fully inserted. Try a gentle wiggle. The lock mechanism might be a bit stiff.
- Lock Jammed: If the lock mechanism is truly jammed, do not force it. Contact your e-bike manufacturer or a qualified e-bike mechanic. Forcing it can damage the lock or the battery housing.
- Wrong Key: Some bikes have keyed alike systems for different components, but often, the battery key is unique.
Battery Won’t Release
- Latch Not Engaged: Make sure you are pressing or pulling the release mechanism correctly.
- Battery Seated Too Tightly: Sometimes, vibrations can cause the battery to seat very firmly. Try gently pushing the battery into the mount slightly before attempting to release and pull it out. This can sometimes disengage a tight fit.
- Dirt/Debris: Small particles can get lodged between the battery and the mount, preventing release. Inspect the edges of the battery and mount for anything visible.
Battery Feels Stuck
- Gentle Wiggle: A slight side-to-side or up-and-down wiggle while pulling can help.
- Check for Obstructions: Ensure no cables or accessories are interfering with the battery’s path out.
When to Consider E-Bike Battery Replacement
Eventually, all batteries need replacing. Your e-bike battery’s performance will degrade over time and with use.
- Reduced Range: If you notice a significant decrease in how far you can ride on a single charge, it might be time for a new battery.
- Slower Charging: If the battery takes much longer to charge than it used to, or if it stops charging altogether, this is a strong indicator.
- Physical Damage: Any visible swelling, leaking, or significant damage to the battery casing is a sign it needs immediate replacement and should not be used.
- Error Codes: Some e-bike systems display error codes related to battery health. Consult your manual if you see these.
- Age: Most lithium-ion e-bike batteries have a lifespan of around 500-1000 charge cycles. Even with careful maintenance, they will eventually wear out.
When considering e-bike battery replacement, always opt for genuine or high-quality compatible batteries from reputable manufacturers. An incompatible or low-quality battery can damage your e-bike or pose a significant safety risk.
Frequently Asked Questions (FAQ)
Q1: How often should I remove my e-bike battery?
A: It’s generally recommended to remove your e-bike battery for charging. This also allows for regular inspection as part of your e-bike battery maintenance.
Q2: Can I leave my e-bike battery on the bike to charge?
A: Most manufacturers allow charging while the battery is on the bike. However, removing it can offer better ventilation and prevent potential issues with the bike’s electronics if something were to go wrong with the charger. Always check your bike’s manual.
Q3: What if I lose my e-bike battery key?
A: Contact your e-bike manufacturer or a local dealer. They can usually provide a replacement key based on your bike’s serial number or battery lock code.
Q4: Is it safe to remove the battery in the rain?
A: It’s best to avoid removing or installing the battery in wet conditions. Ensure both the battery and the mounting area are dry to prevent damage from moisture.
Q5: How do I know if my e-bike battery is faulty?
A: Signs include a significantly reduced range, the battery not holding a charge, the battery taking an unusually long time to charge, or visible physical damage like swelling or leaks. Your e-bike’s display might also show error codes related to battery health.
Q6: Where can I find information about my specific e-bike battery removal process?
A: The most accurate information will be in your e-bike’s owner’s manual. If you no longer have it, you can usually find a PDF version on the manufacturer’s website.
By following these detailed steps and tips, you can confidently perform e-bike battery removal and ensure your electric bike remains in top condition for many rides to come. Remember, safe practices are key to enjoying your e-bike for years!