
Bike brake noise is a common and annoying problem. Can you fix squeaky bike brakes yourself? Yes, you can! With a bit of knowledge and the right tools, you can silence those bothersome squeaks and ensure your brakes work safely and effectively. This guide will walk you through diagnosing and fixing bike brake noise troubleshooting, covering both squeaky disc brakes fix and noisy rim brakes repair. We’ll explore the common bike brake squeal causes and provide clear steps on how to stop brake squeaking.
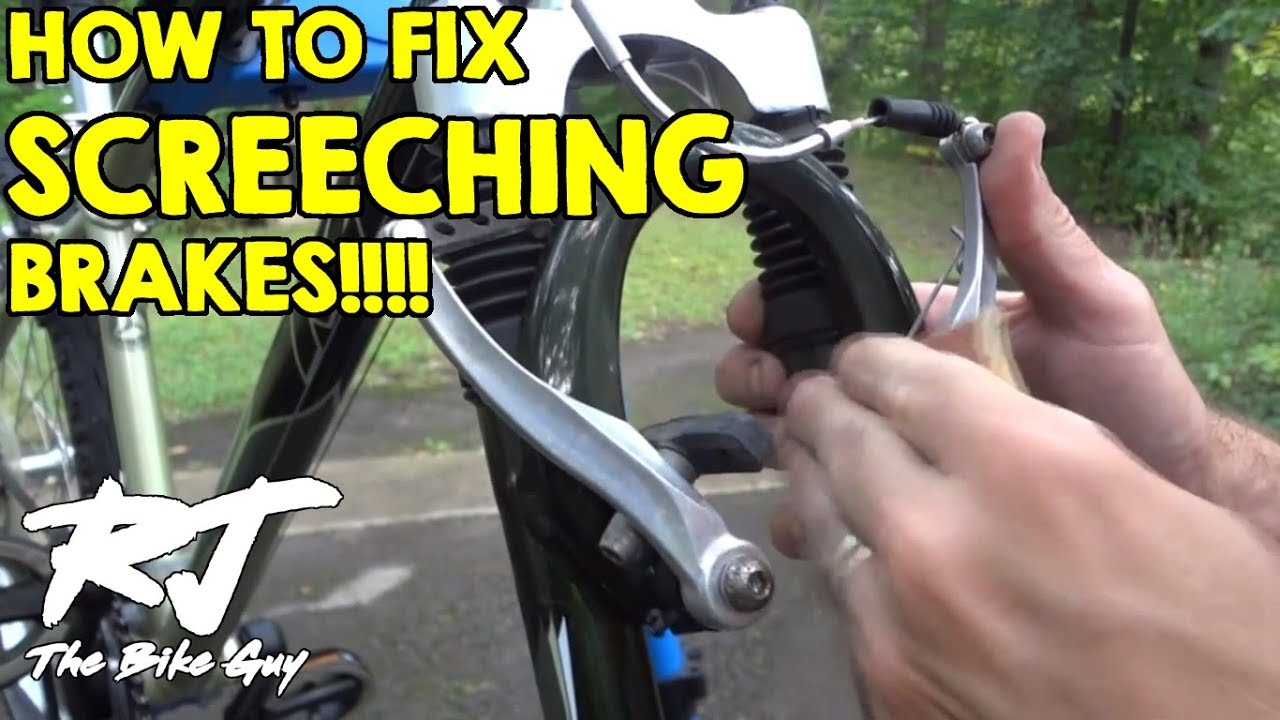
Image Source: i.ytimg.com
Why Do Bike Brakes Squeak? Deciphering the Causes
The high-pitched whine or grinding sound coming from your bike brakes is more than just a nuisance; it often signals an issue that needs attention. These sounds are typically caused by vibrations. When your brake pads press against your brake rotor (for disc brakes) or rim (for rim brakes), friction is created. If this friction causes a specific vibration frequency, you hear a squeal. Several factors can contribute to these vibrations.
Common Bike Brake Squeal Causes
- Contamination: This is perhaps the most frequent culprit. Grease, oil, road grime, or even residue from your hands can get onto your brake pads or rotors/rims. This contamination changes the friction properties, leading to uneven contact and vibrations. For disc brakes, oil contamination on the rotor or pads is a primary cause of squealing. For rim brakes, grit and oil on the rim surface can be the issue.
- Glazed Brake Pads: Over time, if brakes are used heavily or repeatedly stop the bike from high speeds without adequate cooling, the surface of the brake pads can become hardened and polished – this is called glazing. A glazed pad doesn’t grip as effectively and can vibrate more easily, producing a squeal.
- Misaligned Brake Pads or Calipers: When brake pads aren’t perfectly aligned with the rotor or rim, they can make uneven contact. This off-center pressure can cause vibrations and noise. For disc brakes, this could be the caliper itself being slightly out of alignment, or the rotor not being perfectly true. For rim brakes, it might be the brake pads hitting the tire sidewall or not being centered on the rim.
- Worn Brake Pads: As brake pads wear down, their shape can change. If they wear unevenly or if the backing plate starts to make contact with the rotor or rim, it can lead to squealing.
- Moisture and Debris: Especially after riding in wet conditions or through dusty trails, water and grit can get trapped between the pad and the rotor/rim. This creates a grinding or squealing sound as the pad scrapes through the debris.
- Improper Pad Bedding-In (Disc Brakes): New disc brake pads and rotors need a process called “bedding-in” to create an optimal, even layer of pad material on the rotor surface. If this isn’t done correctly, it can lead to inconsistent friction and squealing.
- Loose Components: While less common for squealing specifically, a loose brake lever, caliper, or rotor can introduce vibrations that might be heard as noise, though often this is more of a rattle or clunk.
- Material of Brake Pads: Different brake pad materials (organic, metallic, semi-metallic) have different friction characteristics. Some materials are more prone to squealing than others, especially in certain conditions. Metallic pads, for instance, can be noisier in wet weather.
Tackling the Squeal: A Step-by-Step Approach
Fixing bicycle brake noise requires a systematic approach. We’ll break down the bike brake noise troubleshooting into manageable steps, starting with the most common issues.
Step 1: Cleaning Your Bike Brakes
Cleaning bike brakes is the first and often most effective step. Contamination is a primary cause of squealing.
Cleaning Disc Brakes
For squeaky disc brakes fix, cleaning the rotor and pads is paramount.
- Remove the Wheels: This gives you better access.
- Remove the Brake Pads: Consult your bike’s manual or a reliable online tutorial for your specific brake model, as this varies. Typically, there’s a retaining pin or bolt that needs to be removed.
- Clean the Rotors:
- Use a dedicated disc brake cleaner spray. This is specifically formulated to remove oil and grime without leaving residue.
- Alternatively, use isopropyl alcohol (90% or higher) on a clean, lint-free cloth.
- Wipe the entire surface of the rotor thoroughly. Avoid touching the rotor surface with your bare hands after cleaning, as natural oils from your skin can re-contaminate it.
- Clean the Brake Pads:
- For light contamination: You can try sanding the surface of the pads. Use fine-grit sandpaper (around 200-400 grit) and gently scuff the surface of the pad material. This removes a thin layer of contaminated material.
- For heavy contamination (especially oil): If the pads are heavily contaminated with oil, it’s often best to replace them. It’s very difficult to remove oil completely once it has soaked into the porous pad material.
- After sanding, wipe the pads with a clean, lint-free cloth.
- Reinstall Components:
- Reinstall the brake pads according to your brake manufacturer’s instructions. Ensure they are seated correctly.
- Reinstall the wheels.
- Bed-In the Brakes (Crucial for Disc Brakes): After cleaning, or when installing new pads, you must bed them in. This process transfers a thin, even layer of pad material onto the rotor.
- Find a safe, open area.
- Start from a moderate speed (e.g., 10-15 mph).
- Apply the brake firmly, but do not lock the wheel, and slow down to a walking pace.
- Repeat this 10-20 times for each brake.
- Allow the brakes to cool down completely between sets of applications.
- This process helps create consistent friction and reduce squealing.
Cleaning Rim Brakes
For noisy rim brakes repair, cleaning the rims and pads is key.
- Remove the Wheels:
- Clean the Rims:
- Use a rag with some mild soap and water to wipe down the braking surface of the rim.
- For tougher grime or glaze, a bit of isopropyl alcohol can also be effective.
- Ensure the rim is completely dry before proceeding. Avoid getting oil or lubricants on the rim surface.
- Clean the Brake Pads:
- Examine the brake pads for embedded grit or wear.
- You can often clean the pads by gently sanding the braking surface with fine-grit sandpaper, similar to disc brake pads.
- If the pads are heavily worn or damaged, it’s time for replacement.
- Reinstall Wheels:
- Test Brakes: Check that the brake pads are making firm, even contact with the rim surface.
Step 2: Checking and Adjusting Brake Pad Alignment
Misalignment is another common reason for bike brake squeal causes. Proper bike brake adjustment squeal prevention is vital.
Disc Brake Pad Alignment
- Check Caliper Alignment:
- Spin the wheel and observe the rotor. Does it wobble significantly? If so, the rotor might need truing (a separate process, usually done by a bike mechanic).
- With the wheel in place, look at the caliper. The brake pads should straddle the rotor evenly.
- You can sometimes adjust caliper alignment by slightly loosening the caliper mounting bolts, squeezing the brake lever firmly to center the caliper on the rotor, and then re-tightening the bolts while holding the lever.
- Pad Clearance: Ensure the pads are not constantly dragging on the rotor when the brake lever is released. A slight drag is sometimes normal, but significant contact will cause noise and wear.
Rim Brake Pad Alignment
- Pad Position on Rim:
- When the brake lever is applied, the brake pads should contact the rim’s braking surface squarely, not the tire.
- They should also be positioned to hit the rim’s braking track and not be too high or too low.
- Pad Toe-In (Disc and Rim Brakes): Some mechanics recommend a slight “toe-in” for brake pads, especially rim brake pads. This means the front edge of the pad makes contact with the rotor/rim slightly before the rear edge. This can help reduce squealing by altering the vibration pattern.
- For rim brakes, you can often achieve this by slightly loosening the bolt holding the brake pad to the brake arm, angling the pad forward, and re-tightening.
- For disc brakes, some pads have a leading edge that is designed for toe-in. Check your pad manufacturer’s recommendations.
Step 3: Bedding-In New Brake Pads (Disc Brakes)
As mentioned in cleaning, if you’ve installed new bike brake pad maintenance is crucial.
- Why Bed-In? New pads have a raw surface. Bedding-in creates a transfer layer of pad material onto the rotor. This layer ensures consistent friction and prevents uneven contact, a major cause of squeal.
- How to Bed-In:
- Start with clean rotors and pads.
- Ride at about 10-15 mph.
- Apply the brake firmly to slow down to a walking pace. Do not come to a complete stop and don’t drag the brakes.
- Repeat this 15-20 times for each brake.
- Let the brakes cool down completely.
- Repeat the process again if necessary.
Step 4: Inspecting and Replacing Brake Pads
Worn-out brake pads can be a significant source of bicycle brake noise. Bike brake pad maintenance includes regular inspection.
- Check Pad Thickness: Most brake pads have a wear indicator line. When the pad material is worn down to this line, it’s time for replacement. If there’s no indicator, aim to replace them when the pad material is 1mm or less thick.
- Check for Uneven Wear: If one side of the pad is worn more than the other, it can indicate an alignment issue.
- Check for Glazing or Contamination: If the pads look shiny, hard, or discolored, they may be glazed or contaminated. While sanding can sometimes help, replacement is often the best squeaky bike brakes solution.
- Types of Brake Pads:
- Organic (Resin): Softer, quieter, good initial bite, wear faster, perform poorly in wet conditions. Less prone to squeal.
- Metallic (Sintered): Harder, better in wet and muddy conditions, last longer, can be noisier and require more force to bed-in. More prone to squeal if contaminated or improperly bedded.
- Semi-Metallic: A blend of both, offering a balance of performance and noise.
Step 5: Rotor Truing and Maintenance (Disc Brakes)
A bent or warped rotor can cause constant rubbing or pulsating brake feel, which can contribute to noise.
- Checking Rotor Straightness:
- With the wheel off the bike, spin the rotor and watch it closely. Look for any side-to-side wobble.
- Alternatively, use a dial indicator or a feeler gauge.
- Truing a Rotor: This can be done with a specialized rotor truing tool. It involves gently bending the rotor in the opposite direction of the wobble. This is a delicate process, and if you’re not comfortable, it’s best left to a bike shop.
- Rotor Surface: Ensure the rotor surface is smooth and free from deep scratches or scoring.
Step 6: Lubrication (Use Sparingly and Carefully!)
Lubrication is generally not recommended for the braking surfaces of disc brake rotors or rims. However, for some specific squeaky rim brakes repair, a tiny amount of lubricant on the caliper pivot points or brake cable housing can sometimes quiet down squeaks originating from the actuation mechanism rather than the braking surface itself. Never get lubricant on the pads or rotors/rims.
Specific Issues and Advanced Troubleshooting
Squeaky Disc Brakes Fix: More In-Depth
If cleaning, alignment, and new pads don’t solve squeaky disc brakes fix, consider these:
- Rotor Surface Finish: Some rotors have drilled holes or slots. While generally not a cause of squeal, a damaged or uneven surface here can be.
- Pad Backing Plate: Ensure the metal backing plate of the brake pad isn’t contacting the rotor. This usually means the pads are worn out.
- Brake Fluid Contamination: If you’ve recently bled your hydraulic disc brakes and suspect fluid contamination, the system may need to be flushed and refilled. This is a job best left to a mechanic if you’re not experienced.
- Brake Caliper Piston Issues: Sometimes, the pistons that push the brake pads can stick or not retract evenly, causing the pads to drag or apply uneven pressure. Cleaning and lubricating the pistons (carefully, without getting anything on the pad surface) might help, but this is an advanced task.
Noisy Rim Brakes Repair: Deeper Dive
For noisy rim brakes repair beyond cleaning and pad adjustment:
- Cable Friction: A dry or dirty brake cable can cause jerky lever action and potentially noise. Lubricate the cable housing ends and ensure the cable moves freely.
- Loose Spokes: While unlikely to cause squealing, loose spokes can create vibrations that might be perceived as brake noise. Check spoke tension.
- Rim Wear: Rims can wear down over time. If the braking surface becomes too thin or develops a groove, it might affect brake performance and cause noise. Most rims have wear indicator lines.
Maintenance Schedule for Preventing Brake Noise
Consistent bike brake pad maintenance is the best way to prevent squealing and ensure optimal braking performance.
- After Every Wet or Muddy Ride: Clean your rims and rotors with a damp cloth and dry thoroughly.
- Monthly (or every 500 miles):
- Inspect brake pads for wear and damage.
- Clean rotors/rims with disc brake cleaner or isopropyl alcohol.
- Check pad alignment and make adjustments if needed.
- Every 6 Months (or 1000-1500 miles):
- Consider replacing brake pads if they are worn.
- For hydraulic disc brakes, consider having the system flushed and new fluid installed by a mechanic.
Frequently Asked Questions (FAQ)
Q1: How do I know if my brake pads need replacing?
A1: Check the thickness of the pad material. Most pads have a wear indicator line. If the pad material is worn down to that line, or if it’s only 1mm thick, they need replacing. Also, look for uneven wear, cracks, or glazing (a shiny, hard surface).
Q2: Can I use automotive brake cleaner on my bike disc brakes?
A2: It’s generally best to use a cleaner specifically designed for bicycle disc brakes or isopropyl alcohol (90% or higher). Some automotive cleaners can be too aggressive and may damage certain components or leave residues that are hard to remove.
Q3: My brakes squeal only when wet. What should I do?
A3: This is common, especially with metallic brake pads. Ensure your rotors and pads are clean. If the problem persists, try switching to organic (resin) brake pads, which tend to be quieter in wet conditions, though they wear faster. A slight toe-in on the pads can also help mitigate wet weather squeal.
Q4: I cleaned everything, but my brakes still squeal. What else could it be?
A4: If cleaning and alignment haven’t worked, consider:
* Glazed pads: Try sanding them more aggressively or replace them.
* Warped rotor: This requires truing or replacement.
* Improper bedding-in: Re-bed the brakes carefully.
* Contaminated hydraulic fluid (disc brakes): This may require a brake bleed.
* Pad material: Different pad compounds perform differently.
Q5: Do I need to “bed-in” rim brakes?
A5: While not as critical as with disc brakes, cleaning rim brake pads and rims, and ensuring they make good contact, is analogous to bedding-in. New rim brake pads might benefit from a few firm stops to create a good initial contact surface.
By following these steps, you can effectively tackle bike brake squeal causes and enjoy quieter, more reliable braking. Regular bike brake pad maintenance and attentive bike brake adjustment squeal prevention will keep your rides safe and pleasant.