
Yes, you can true a dirt bike wheel at home. Truing a dirt bike wheel involves adjusting the spoke tension to eliminate wobbles and ensure the rim runs straight. This guide will walk you through the process, making it accessible even for beginners.
A wobbly dirt bike wheel is more than just annoying; it can significantly impact your bike’s handling, braking performance, and overall safety. If your front or rear wheel feels loose, unstable, or makes strange noises when you ride, it’s likely suffering from rim runout. This wobble can manifest as either lateral runout (side-to-side movement) or radial runout (up-and-down movement), or a combination of both. The good news is that with a few simple tools and a bit of patience, you can effectively true your dirt bike wheel and restore its smooth, predictable performance. This process is often referred to as truing a motorcycle wheel, and it’s a fundamental skill for any DIY dirt bike enthusiast.
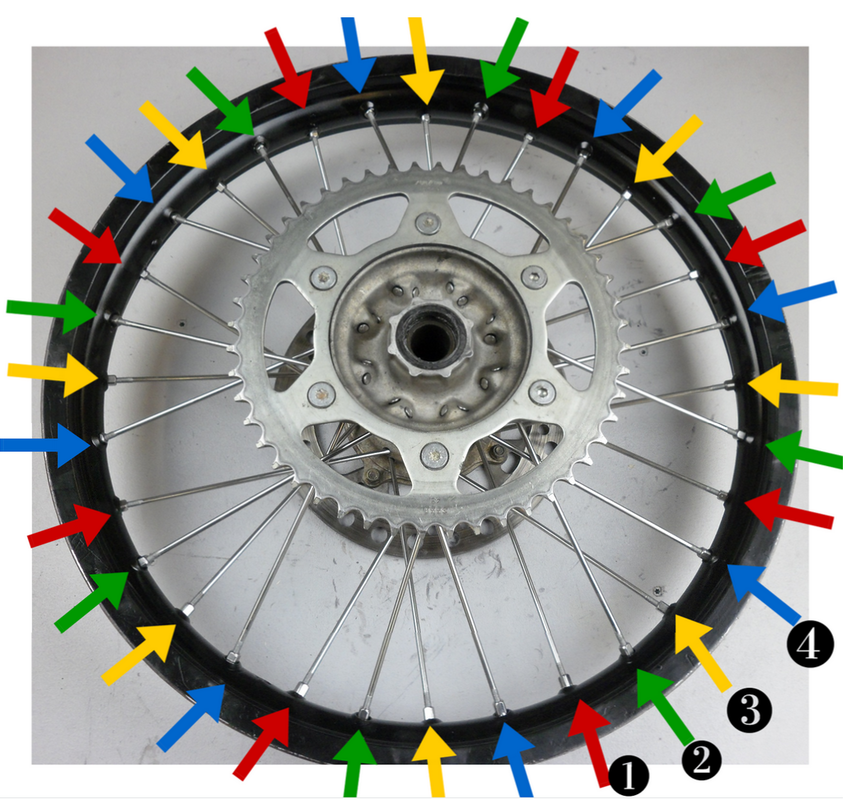
Image Source: www.diymotofix.com
Why Your Dirt Bike Wheel Needs Truing
Over time and through the rigors of off-road riding, the spokes on your dirt bike wheel can loosen, break, or become unevenly tensioned. Impacts from rocks, roots, jumps, and even just general wear and tear can cause the rim to bend or shift out of alignment.
Common Causes of Wheel Wobble:
- Loose Spokes: The most frequent culprit. As spokes loosen, they create play in the wheel structure.
- Uneven Spoke Tension: Some spokes might be tighter than others, pulling the rim out of true.
- Damaged Rim: Hard impacts can bend or dent the rim itself, leading to significant runout.
- Bent Spokes: A bent spoke can create a specific point of stress and deviation.
- Worn Hub or Bearings: While less common for direct truing issues, worn bearings can contribute to perceived instability.
Addressing these issues through wheel truing not only improves your riding experience but is crucial for preventing further damage and ensuring your safety on the trail.
Essential Tools for Wheel Truing
Before you start, gather the necessary equipment. Having the right tools makes the job significantly easier and more accurate.
The Core Tools
- Wheel Truing Stand: This is arguably the most important tool. A good wheel truing stand holds your wheel securely and allows it to spin freely. It usually features adjustable indicators or pointers that help you measure and pinpoint exactly where the rim is out of true.
- Spoke Wrench: A high-quality spoke wrench is designed to fit the nipples on your spokes. These come in various sizes, so ensure you have the correct one for your bike’s spokes. Using the wrong size can damage the spoke nipples.
- Tire Levers: You’ll need these if you plan to remove the tire to access the spokes more easily, especially for significant repairs or spoke replacement.
- Air Pressure Gauge: To reinflate your tire to the correct pressure after reassembly.
- Rag and Degreaser: For cleaning the wheel and spokes.
- Marker Pen: To mark out-of-true spots on the rim.
- Gloves: To keep your hands clean and provide grip.
Optional but Helpful Tools
- Dial Indicator: For highly precise measurement of rim runout. This attaches to the truing stand and gives very accurate readings of how much the rim deviates.
- Spoke Torque Wrench: For experienced mechanics who want to ensure precise and uniform spoke tension.
- Thread Loosener/Anti-Seize: To apply to spoke threads if they are stiff or prone to corrosion.
Preparing Your Dirt Bike Wheel for Truing
Proper preparation ensures a smooth and efficient truing process.
Step 1: Clean Your Wheel
Start by thoroughly cleaning your wheel assembly. Remove dirt, mud, and grease from the rim, spokes, and hub. A clean wheel makes it easier to see exactly where the problem lies.
Step 2: Remove the Tire and Tube (If Necessary)
For minor adjustments, you might be able to true the wheel with the tire still on. However, for significant rim runout or if you suspect spoke damage, it’s often best to remove the tire and tube. This gives you direct access to all the spokes and nipples.
- Deflate the tire completely.
- Use tire levers to carefully pry the tire bead off the rim.
- Remove the inner tube.
Step 3: Mount the Wheel on the Truing Stand
Securely mount your wheel onto the wheel truing stand. Ensure it’s centered and spins freely without wobbling on the stand itself. Most stands have adjustable cones or holders to accommodate different axle sizes.
The Truing Process: Step-by-Step
Now, let’s get down to the actual process of truing your wheel. The key is making small, incremental adjustments.
Step 1: Initial Assessment and Spoke Tension Check
Spin the wheel slowly and observe any wobble. Use the indicators on your wheel truing stand to identify the high and low spots of the rim.
- Lateral Runout: Identify the points where the rim moves side-to-side.
- Radial Runout: Identify the points where the rim moves up and down.
You can use a marker to lightly mark the areas on the rim that are out of true. Also, lightly tap each spoke with a small wrench or screwdriver. A loose spoke will sound dull, while a tighter, well-tensioned spoke will produce a higher-pitched ping. This gives you a general idea of overall spoke tension.
Step 2: Addressing Lateral Runout (Side-to-Side Wobble)
Lateral runout is corrected by tightening spokes on the side the rim is leaning away from, and loosening spokes on the side the rim is leaning towards.
Example:
- If the rim is leaning to the left at a specific point, you need to tighten spokes on the right side of the hub at that location, and/or loosen spokes on the left side.
- If the rim is leaning to the right, tighten spokes on the left side, and/or loosen spokes on the right side.
How to Make Adjustments:
- Identify the problem area: Spin the wheel and note where the rim deviates from center.
- Choose spokes to adjust: For lateral runout, you’ll adjust spokes on the side. If the rim is high on the left, tighten the spokes on the left side of the hub that connect to that high spot. If it’s high on the right, tighten spokes on the right.
- Make small turns: Use your spoke wrench to turn the nipples. A quarter-turn is usually sufficient for initial adjustments. Remember that tightening a spoke pulls the rim towards that side, and loosening it allows the rim to move away.
- Alternate sides: If you have runout on both sides, you might need to tighten spokes on one side and loosen them on the other for the same section of the rim.
- Check frequently: After each small adjustment, spin the wheel again to see the effect. It’s better to make many small adjustments than a few large ones.
Step 3: Addressing Radial Runout (Up-and-Down Wobble)
Radial runout occurs when the rim dips or rises as it spins. This is often caused by uneven spoke tension or a slightly out-of-round rim.
Example:
- If there’s a “hop” or high spot, you need to loosen the spokes that connect to that specific area of the rim.
- If there’s a “dip” or low spot, you need to tighten the spokes that connect to that area.
How to Make Adjustments:
- Identify the problem area: Spin the wheel and note where the rim deviates vertically.
- Choose spokes to adjust: For radial runout, you’ll adjust spokes that attach to the rim at that specific high or low point.
- Make small turns: Use your spoke wrench to tighten or loosen the nipples. If the rim is high at a certain point, loosen the spokes attached to the rim at that point. If it’s low, tighten them.
- Consider opposite sides: For radial runout, you might need to adjust spokes on both the drive side and non-drive side simultaneously, or spokes that cross over each other. Tightening spokes on one side of the hub will pull the rim towards that side, and also slightly upwards at that point. Loosening them will have the opposite effect.
Step 4: Balancing Tension and Eliminating Wobble
The goal is to achieve a uniform spoke tension throughout the wheel, which will resolve both lateral and radial runout. This is where patience is crucial.
- Work around the wheel: Don’t focus on one area for too long. Make adjustments, spin the wheel, assess, and move to another area.
- Progressive tightening/loosening: As you get closer to true, make even smaller adjustments.
- Listen to the spokes: As you approach consistent tension, the spokes should all have a similar “ping” when tapped.
Step 5: Final Checks and Refinements
Once you believe the wheel is true, give it a final spin.
- Check for any remaining side-to-side or up-and-down movement.
- Make final minor adjustments as needed.
- If you used a dial indicator, check your measurements against your desired tolerances.
Truing a Motorcycle Wheel: Advanced Considerations and Troubleshooting
Sometimes, a wheel is more than just out of adjustment. Here’s how to handle more complex situations.
Dealing with Stubborn Spokes
If spoke nipples are seized or corroded, applying a penetrating oil or a spoke thread lubricant can help. Allow it to soak in before attempting to turn. If a nipple still won’t budge, you might need to carefully cut it off or consider replacing the spoke.
Replacing Damaged Spokes or Nipples
If you find a bent spoke or a damaged nipple, it’s best to replace it.
- Remove the old spoke/nipple: If the spoke is broken, you might need to cut it or use pliers to grip and unscrew the remaining part from the hub. For damaged nipples, you might need to cut them off with a Dremel tool.
- Install the new spoke: Thread the new spoke through the hub flange and into the new nipple. Ensure you’re using the correct spoke length and type.
- Initial tensioning: Thread the nipple on by hand as far as it will go. Then, using your spoke wrench, tighten it until it has roughly the same number of turns as the adjacent spokes.
- Integrate into truing: Once the new spoke is in place, continue the truing process, adjusting its tension along with others until the wheel is straight and the tension is uniform.
Rim Repair vs. Truing
For minor bends or dents in the rim, rim repair might be possible. However, significant damage often means the rim needs to be replaced entirely. A bent rim will make wheel alignment very difficult, if not impossible, to achieve correctly.
Spoke Tension: The Key to a Durable Wheel
Achieving proper and even spoke tension is crucial for the longevity and performance of your dirt bike wheel.
What is Ideal Spoke Tension?
Ideal spoke tension varies by motorcycle model and rim type. Manufacturers often specify tension values in foot-pounds (ft-lbs) or inch-pounds (in-lbs).
- Too loose: Leads to wobble, premature wear on spokes and nipples, and can cause the wheel to feel unstable.
- Too tight: Can lead to spoke breakage, rim distortion, and even damage to the hub.
Measuring Spoke Tension
- By Sound: As mentioned earlier, a consistent “ping” when tapping spokes indicates similar tension. This is a qualitative method.
- Using a Spoke Tension Gauge: This is a more precise tool that measures the actual tension of each spoke. For serious builders or those aiming for factory-level accuracy, a tension gauge is invaluable.
Balancing Spoke Tension During Truing
As you adjust for rim runout, you are inherently adjusting spoke tension. The goal is to reach a point where all spokes are tight enough to prevent movement but not so tight that they cause damage, and all are pulling evenly on the rim.
Putting it All Back Together
Once your wheel is true and all spokes are properly tensioned, it’s time to reassemble.
Step 1: Reinstall Tire and Tube (If Removed)
- Lubricate the tire beads and rim edge to make installation easier.
- Carefully install the inner tube, ensuring it’s not pinched.
- Seat the tire beads onto the rim, working your way around.
- Inflate the tire to the manufacturer’s recommended pressure.
Step 2: Reinstall the Wheel
- Place the wheel back into your dirt bike’s forks or swingarm.
- Ensure the axle is properly seated.
- Tighten axle nuts and pinch bolts to the manufacturer’s specifications.
- Check your brake caliper alignment to ensure it’s not rubbing the rotor. Proper wheel alignment can be affected by how the wheel is seated in the forks.
Step 3: Final Test Ride
Take your bike for a short, gentle test ride. Listen for any unusual noises and pay attention to how the wheel feels. If everything feels smooth and stable, you’ve successfully trued your dirt bike wheel!
Frequently Asked Questions (FAQ)
Here are some common questions about truing dirt bike wheels:
Q1: How often should I true my dirt bike wheel?
A: It’s good practice to check your spoke tension and the trueness of your wheels regularly, especially after a hard riding session or if you notice any instability. Many riders check before long trips or major events.
Q2: Can I true a wheel with a bent rim?
A: You can attempt to true a wheel with a slightly bent rim, but significant bends are very difficult to correct with spoke adjustments alone. If the rim is severely bent, it’s better to replace it for proper wheel alignment and safety.
Q3: How do I know if my spokes are too loose or too tight?
A: Loose spokes will have a dull sound when tapped and can cause wobble. Over-tightened spokes can lead to spoke breakage and premature rim wear. Ideally, all spokes should have a similar, higher-pitched “ping” when tapped, indicating good tension.
Q4: What is considered a “true” wheel?
A: A true wheel has minimal to no rim runout (both lateral and radial) and has consistent spoke tension across all spokes. The rim should spin perfectly straight without wobbling or hopping.
Q5: Do I need a specialized wheel truing stand?
A: While not strictly mandatory, a wheel truing stand is highly recommended. It provides a stable platform and allows for accurate measurement of runout, making the process much more precise and efficient. Trying to true a wheel without one is significantly more difficult and less accurate.
Q6: What’s the difference between lateral and radial runout?
A: Lateral runout refers to the side-to-side wobble of the rim. Radial runout refers to the up-and-down wobble or “hop” of the rim. Both need to be addressed to achieve a truly true wheel.
By following these steps, you can effectively manage your dirt bike’s wheel health, ensuring a safer and more enjoyable ride. Truing a wheel is a rewarding skill that can save you money and keep you on the trails.