
Image Source: blog.amsoil.com
How To Clean A Dirt Bike: Pro Tips
Can you wash a dirt bike with regular car soap? Yes, you can, but specialized dirt bike cleaning products are much better for protecting your bike’s components. This comprehensive dirt bike washing guide will walk you through everything you need to know for effective post-ride dirt bike cleaning and ongoing dirt bike maintenance cleaning. Keeping your dirt bike pristine isn’t just about looks; it’s crucial for its longevity and performance.
Why Regular Cleaning is Essential
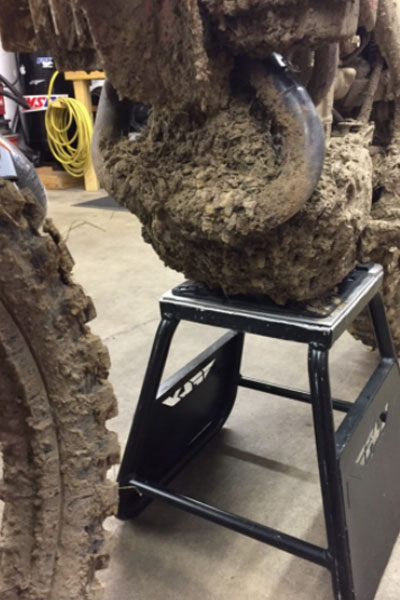
After a muddy, dusty, or gritty ride, your dirt bike accumulates a significant amount of grime. This isn’t just unsightly; it can cause real damage. Dirt and debris can work their way into bearings, seals, and cables, leading to premature wear and tear. Mud can trap moisture against metal parts, promoting rust and corrosion. Moreover, a clean bike makes it easier to spot potential problems like loose bolts, damaged hoses, or leaks before they become major issues. Think of cleaning as preventative maintenance.
Gathering Your Cleaning Arsenal: Best Dirt Bike Cleaning Products
Before you start, having the right tools and cleaners makes a huge difference. Here’s a breakdown of what you’ll need:
- Dirt Bike Specific Wash Soap: Look for biodegradable, pH-neutral soaps designed for motorcycles. These won’t strip away existing lubricants or damage sensitive plastics and finishes.
- Degreaser: Essential for tackling oily, stubborn grime, especially on the drivetrain. Citrus-based degreasers are often a good, less harsh option.
- Water Source: A hose with adjustable spray nozzle is ideal. Avoid high-pressure washers unless you’re very careful, as they can force water into bearings and electrical components.
- Brushes:
- Soft Bristle Brush: For general bodywork and plastics.
- Stiff Bristle Brush: For stubborn mud and the wheels.
- Detailing Brushes: Small brushes for getting into tight crevices.
- Sprocket Brush: A dedicated brush for cleaning your chain and sprockets.
- Sponges or Microfiber Mitts: For washing the frame, plastics, and seat.
- Microfiber Towels: Plenty of them for drying and polishing.
- Chain Lube: For re-lubricating the chain after cleaning.
- Protectants and Polishers: For plastics, seat, and metal parts.
- Bucket(s): At least two – one for soapy water, one for rinsing your brushes/mitts.
- Gloves: To protect your hands from chemicals and dirt.
- Eye Protection: Safety glasses are a good idea.
The Ultimate Dirt Bike Cleaning Steps: A Step-by-Step Approach
This detailed dirt bike detailing steps guide will ensure every part of your machine is cared for.
Step 1: Pre-Rinse and Initial Mud Removal
- Hose Down: Start by giving your entire bike a good rinse with water. This removes loose dirt and mud, making the subsequent washing easier.
- Targeted Spray: Use a medium spray setting to dislodge caked-on mud, especially around the wheels, fenders, and frame. Avoid spraying directly into airbox openings, exhaust ports, or electrical connections.
Step 2: Degreasing the Drivetrain
This is a crucial part of cleaning dirt bike drivetrain and preventing premature wear.
- Apply Degreaser: Spray a motorcycle-specific degreaser liberally onto the chain, sprockets, and rear derailleur (if applicable). Let it sit for the time recommended on the product label, usually a few minutes, to break down the grease and grime.
- Scrubbing Action: Use a stiff brush or a dedicated sprocket brush to scrub the chain and sprockets thoroughly. Get into all the links and between the sprocket teeth.
- Rinse: Rinse the degreased area thoroughly with water. Ensure all degreaser residue is gone, as it can damage seals if left behind.
Step 3: Washing the Bike’s Body
This is where you’ll use your wash soap and brushes.
- Prepare Your Wash Buckets: Fill one bucket with water and your chosen dirt bike wash soap. Fill the second bucket with clean water for rinsing your mitts or brushes.
- Start from the Top: Begin washing the bike from the top down. This ensures that dirty water flows away from areas you’ve already cleaned.
- Wash Sections: Work in sections. Dip your wash mitt or sponge into the soapy water, wash a panel or section of the bike, then rinse your mitt/sponge in the clean water bucket before dipping back into the soapy water. This prevents you from spreading dirt back onto the bike.
- Wheels and Undercarriage: Pay special attention to the wheels, swingarm, and the underside of the frame. These areas collect the most grit and mud. Use a stiffer brush here if needed.
Step 4: Cleaning Stubborn Grime and the Airbox
- Detailing Brushes: Use smaller detailing brushes to clean around the handlebars, levers, pedals, and any other intricate areas.
- Airbox Cleaning: This is a vital aspect of dirt bike maintenance cleaning.
- Remove the Seat: This usually gives you access to the airbox.
- Remove the Air Filter: Carefully remove the air filter. Inspect it for damage.
- Clean the Airbox: Use a slightly damp cloth or a detailing brush to clean the inside of the airbox. Ensure no debris falls into the intake. Never spray water or cleaners directly into the airbox opening when the filter is out.
- Air Filter Cleaning: Follow the manufacturer’s instructions for cleaning your specific air filter. Most can be cleaned with specialized filter cleaner or mild soap and water, then allowed to dry completely.
Step 5: Addressing the Carburetor (If Necessary)
While not a regular cleaning task, if you’re experiencing performance issues or doing a deep clean, you might need to consider cleaning dirt bike carburetor.
- External Cleaning: For a general clean, you can use a carburetor cleaner spray on the exterior. Spray it onto a cloth and wipe down the carb body.
- Internal Cleaning (Advanced): This involves disassembling the carburetor. If you’re not comfortable with this, it’s best left to a professional or someone with experience. The process typically involves removing jets, the float bowl, and cleaning them with carburetor cleaner and compressed air. Ensure all passages are clear.
Step 6: Rinsing Off the Soap
- Thorough Rinse: Once you’ve washed the entire bike, rinse it thoroughly with clean water. Start from the top and work your way down, ensuring all soap residue is removed.
- Gentle Pressure: Use a medium spray setting. Avoid blasting water directly into sensitive areas like the engine case, electrical connectors, or bearing seals.
Step 7: Drying the Bike
Proper drying is crucial to prevent water spots and rust.
- Initial Shake-Off: Give the bike a good shake to remove excess water.
- Microfiber Towels: Use clean, absorbent microfiber towels to dry the bike. Work from top to bottom.
- Blow Dryer (Optional): For hard-to-reach areas or to ensure electrical components are dry, a leaf blower or even a hair dryer on a cool setting can be very effective. Pay close attention to nooks and crannies where water can hide.
Step 8: Lubrication and Protection
This final step makes your bike look great and protects it.
- Chain Lubrication: Once the drivetrain is dry, apply a quality motorcycle chain lubricant. Spin the rear wheel backward as you apply the lube to the inside of the chain. Wipe off any excess lube with a clean cloth to prevent it from attracting dirt.
- Plastic and Metal Polish: Apply a plastic protectant or polish to the plastics, seat, and any metal components. This will restore their shine and protect them from UV rays and dirt.
- Silicone Spray: A light application of silicone spray can help repel water and dirt from plastics and frame areas on your next ride.
Table: Recommended Dirt Bike Cleaning Products
| Product Type | Purpose | Examples | Notes |
|---|---|---|---|
| Wash Soap | General cleaning of bodywork, frame, and plastics. | Motul Wash & Wax, Muc-Off Motorcycle Cleaner | Biodegradable, pH-neutral is best. |
| Degreaser | Removing oil, grease, and heavy grime from drivetrain. | Muc-Off Bike Degreaser, WD-40 Bike Degreaser | Citrus-based is often gentler. |
| Chain Cleaner | Specifically formulated for cleaning motorcycle chains. | K&N Filter Cleaner, Motul C4 Chain Lube | Can also be used for general drivetrain cleaning. |
| Plastic Protectant | Restores shine and protects plastics from UV and dirt. | Armor All, Plexus Plastic Polish | Look for UV protection. |
| Chain Lube | Lubricates the chain to reduce friction and wear. | Motul C2+ Chain Lube, Maxima Chain Wax | Choose based on riding conditions (wet/dry). |
| Detailing Sprays | For final wipe-downs and adding shine. | Simple Green Bike Cleaner, Waterless Wash sprays | Great for light dust and touch-ups. |
| Tire Shine | Enhances tire appearance. | Chemical Guys Tire & Trim Dressing, Eagle One tire shine | Apply sparingly to sidewalls, avoid the tread. |
How to Wash a Motocross Bike: Specific Considerations
While the general steps apply to all dirt bikes, how to wash a motocross bike often involves dealing with more extreme conditions.
- More Aggressive Cleaning: Motocross bikes endure more abuse, so you might need slightly stiffer brushes and more potent degreasers for the drivetrain and suspension components.
- Suspension Care: After washing, it’s a good idea to wipe down fork stanchions and shock bodies with a clean cloth. Some riders use a light silicone spray on fork seals to keep them supple.
- Engine Wash: You can carefully wash the engine casing, but be cautious around electrical components like the spark plug, stator cover, and CDI unit. Cover these with plastic bags if you’re concerned about water ingress.
- Exhaust System: Clean the exhaust pipe and silencer. Ensure the packing material isn’t saturated with water.
Dirt Bike Detailing Steps for Enhanced Protection
Beyond a basic wash, detailing can significantly extend the life of your bike and keep it looking factory fresh.
- Polishing Metal Parts: Use a metal polish on aluminum or stainless steel parts to remove oxidation and restore shine.
- Seat Rejuvenation: A good quality seat cleaner and conditioner can prevent the vinyl from cracking and fading.
- Lubricate Cables: A light spray of lubricant into cable housings can ensure smooth operation.
- Check and Tighten: While cleaning, take the opportunity to check all bolts and fasteners for tightness.
Frequently Asked Questions (FAQ)
Q1: Can I use a pressure washer to clean my dirt bike?
A1: It’s generally not recommended. High-pressure washers can force water past seals into bearings (wheel bearings, steering head bearings, swingarm bearings) and into electrical connectors, causing corrosion and damage. If you do use one, keep the pressure very low and maintain a significant distance. A regular garden hose is safer.
Q2: What’s the best way to clean my chain?
A2: Use a motorcycle-specific chain cleaner or degreaser. Apply it liberally, let it sit, and then scrub with a stiff brush or a dedicated chain cleaning tool. Rinse thoroughly and re-lube once dry.
Q3: How often should I clean my dirt bike?
A3: Ideally, after every ride. Even a quick rinse can prevent dirt and grime from hardening and causing damage. A more thorough clean should be done periodically, depending on how often and in what conditions you ride.
Q4: My bike has really sticky, dried-on mud. What’s the best way to remove it?
A4: Soak the affected areas with your dirt bike wash soap or a specialized pre-wash spray. Let it sit for a few minutes to soften the mud before gently scrubbing with a stiff brush. For very stubborn patches, a mild degreaser might be necessary, followed by a thorough rinse.
Q5: How do I prevent rust on my dirt bike?
A5: Thoroughly dry your bike after washing, especially metal components and fasteners. Apply a rust inhibitor spray or silicone-based protectant to exposed metal parts. Re-lube your chain regularly, as the lubricant also helps displace moisture.
By following these pro tips and dedicating time to your dirt bike maintenance cleaning routine, you’ll not only keep your machine looking sharp but also ensure it performs at its best for years to come. Happy riding!