
Yes, you can hang your bike from the ceiling. It’s a fantastic way to save space, especially if you’re looking for efficient garage bike storage or need a clever space saving bike storage solution. This guide will walk you through how to do it safely and effectively, turning your unused ceiling space into valuable overhead bike storage.
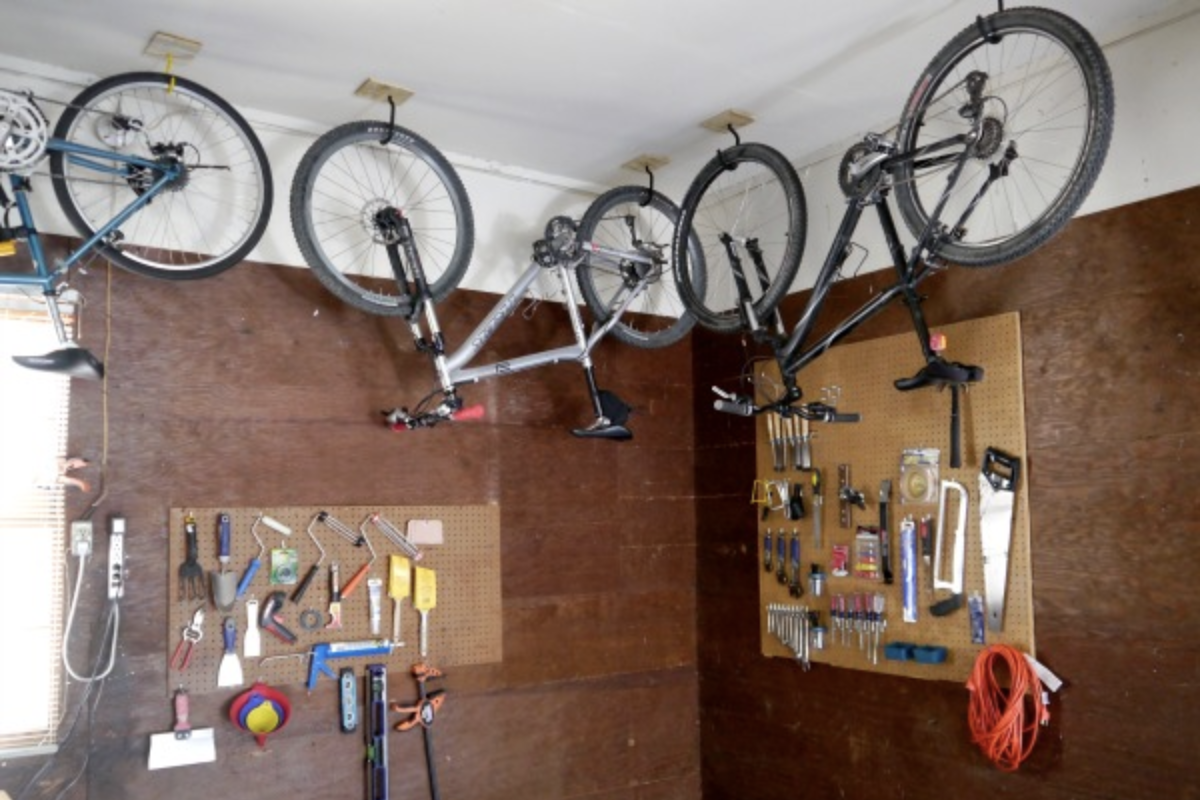
Image Source: www.creatingreallyawesomefunthings.com
Why Go Overhead?
Many of us have bikes but lack the floor space to store them neatly. Whether you live in a small apartment, a crowded house, or simply want to declutter your garage, hanging your bicycle from the ceiling offers a practical and organized solution. It keeps your bike out of the way, prevents it from becoming a tripping hazard, and protects it from potential damage. Plus, it can even add a touch of utilitarian charm to your space.
Benefits of Ceiling Bike Storage:
- Maximizes Floor Space: This is the primary benefit. Freeing up floor space can transform a cluttered garage or room into a functional area.
- Protects Your Bike: Stored overhead, your bike is less likely to be bumped, scratched, or have things piled on top of it.
- Easy Access (with the right system): While it might seem like a hassle, the right bike pulley system or bike hoist makes getting your bike down as easy as lifting it up.
- Organized Appearance: A well-executed ceiling bike rack system creates a tidy and organized look.
- Keeps Floors Clean: No more muddy tire marks on your floor.
Choosing the Right System
There are several excellent options for overhead bike storage. The best choice for you will depend on your budget, the weight of your bike, your ceiling height, and how often you plan to access your bike.
Common Ceiling Bike Storage Solutions:
- Bike Pulley Systems: These are incredibly popular for a reason. A bike pulley system uses ropes and pulleys to lift your bike with ease. They are often adjustable and can handle significant weight.
- Bike Hoists: Similar to pulley systems, a bike hoist typically involves a crank mechanism for lifting. They are robust and designed for frequent use.
- Fixed Ceiling Racks: These are simpler, stationary racks that hook onto your bike’s frame or handlebars and are screwed directly into ceiling joists. They require more manual lifting.
- Wall Mount Bike Storage: While not strictly ceiling storage, it’s worth mentioning as an alternative. Wall mount bike storage solutions are great if you have available wall space and prefer not to lift your bike high.
Fathoming Your Ceiling Structure
Before you even think about buying a system, you need to know what you’re working with above. Your ceiling’s construction is the most critical factor in ensuring safe installation.
Identifying Ceiling Joists:
- What are Ceiling Joists? Ceiling joists are the horizontal beams that support your ceiling and any weight above it. They are typically made of wood and are essential for securely mounting any bicycle ceiling mount.
- Why are Joists Important? Drywall or plaster alone cannot support the weight of a bicycle. You must screw your mounting hardware directly into these sturdy wooden joists.
- Finding Joists:
- Stud Finder: The easiest method. Electronic stud finders detect changes in density behind the drywall.
- Tapping Method: Tap on the ceiling. A hollow sound usually indicates an empty space, while a solid thud suggests you’ve found a joist. This takes practice.
- Locating Wall Studs: Joists usually run perpendicular to the wall studs. If you can find wall studs, you can often estimate where the joists are located above. Measure out from the wall stud line.
- Small Pilot Holes: If you’re unsure, drill small pilot holes in inconspicuous areas to feel for the wood.
Types of Ceilings:
- Drywall Ceilings: The most common type. You’ll be screwing into wood joists that are hidden behind the drywall.
- Plaster Ceilings: Similar to drywall, but often more brittle. Be extra careful when drilling.
- Exposed Joists (Garages/Basements): This is the easiest scenario, as the joists are visible and accessible.
Important Note: Never mount directly into drywall or plaster alone. Always aim for the center of a ceiling joist.
Detailed Guide to Installing a Bike Pulley System
A bike pulley system is a popular choice for overhead bike storage because it makes lifting and lowering your bike relatively effortless.
What You’ll Need:
- Bike Pulley System Kit: Ensure it’s rated for your bike’s weight (most standard kits are for bikes up to 50 lbs, but heavier-duty options exist).
- Drill: With appropriate drill bits.
- Measuring Tape: For accurate placement.
- Pencil: To mark drilling points.
- Stud Finder: To locate ceiling joists.
- Ladder: A sturdy one that allows you to comfortably reach the ceiling.
- Safety Glasses: Essential for eye protection.
- Optional: Wood screws (if the kit doesn’t include ones suitable for your joists).
Step-by-Step Installation:
-
Plan Your Placement:
- Decide where in your garage or room you want to store the bike. Consider clearance needed when the bike is hanging and when you’re moving it around.
- Imagine the path the rope will take. You’ll need a pulley block near the bike and another near the wall or a convenient point for the rope to hang.
- Crucial: Locate two parallel ceiling joists where you will mount the main pulley blocks. Most pulley systems require mounting points spaced apart. Use your stud finder to pinpoint the center of the joists. Measure the required distance between the mounting points as per your kit’s instructions. Mark the precise locations with your pencil.
-
Mount the Main Pulleys:
- Place the first pulley bracket over the marked spot on the first joist. Ensure it’s centered on the joist.
- Put on your safety glasses.
- Using your drill, create pilot holes into the joist at the marked screw points on the bracket. This makes screwing easier and prevents wood from splitting.
- Secure the pulley bracket to the joist using the provided screws (or longer, sturdier wood screws if needed). Make sure it’s firmly attached.
- Repeat this process for the second pulley bracket on the parallel joist. Double-check that the brackets are aligned correctly.
-
Install the Rope Anchor/Cleat:
- Most systems have a rope cleat or anchor that you’ll mount lower down, typically on a wall stud near the storage area. This is where you’ll tie off the rope to hold the bike in place.
- Locate a wall stud using your stud finder.
- Mark the position for the cleat. Ensure it’s at a comfortable height for you to reach and tie off the rope.
- Drill pilot holes and securely attach the cleat to the wall stud.
-
Thread the Rope:
- This is where the “system” comes into play. Follow your kit’s specific instructions carefully.
- Typically, you’ll start by feeding the rope through one main pulley.
- Then, feed it through the second main pulley.
- Next, the rope usually goes through a pulley on the hook that will attach to your bike.
- Finally, the rope runs to the wall cleat.
-
Attach Hooks to Your Bike:
- Most pulley systems come with two hooks. One hook is usually designed to attach to the handlebars, and the other to the seat post or saddle.
- Carefully attach the hooks to your bike. Ensure they are securely fastened and won’t slip off.
- Tip: For easier lifting, try to position the hooks so the bike hangs relatively level. You might need to adjust the hook placement slightly.
-
Test the System:
- Before lifting your bike, pull the rope slowly to ensure the pulleys move freely and the rope isn’t snagging.
- Carefully lift the empty hooks a few feet off the ground to check the mechanism.
- Now, gently attach the hooks to your bike (you might need to temporarily lean it against something or have a helper).
- Slowly pull the rope. The system should lift your bike. If it feels stiff or makes strange noises, stop and re-check your installation and the rope path.
- Lift the bike all the way to the ceiling.
- Secure the rope to the cleat by wrapping it around the cleat and tying it off. Ensure it’s tight enough to hold the bike securely.
Installing a Bike Hoist System
A bike hoist is very similar to a pulley system but often uses a crank or a more direct winding mechanism for lifting.
What You’ll Need:
- Bike Hoist Kit: Rated for your bike’s weight.
- Drill: With appropriate drill bits.
- Measuring Tape.
- Pencil.
- Stud Finder.
- Ladder.
- Safety Glasses.
- Wrench/Socket Set: Depending on the hoist’s mounting hardware.
Step-by-Step Installation:
-
Plan Placement: Similar to the pulley system, identify the best location and the supporting ceiling joists. Hoist systems often require two mounting points spaced apart.
-
Mount the Hoist Components:
- Hoists usually have a ceiling-mounted bracket or two separate mounting points for the pulley system.
- Locate your joists using the stud finder.
- Mark the drill points for the hoist bracket(s) directly into the center of the joists.
- Drill pilot holes.
- Securely attach the hoist mounting bracket(s) to the joists using the provided heavy-duty hardware.
-
Attach Ropes and Hooks:
- Thread the rope through the hoist’s pulley mechanism according to the manufacturer’s instructions.
- Attach the specially designed hooks to your bike, typically one for the handlebars and one for the seat post.
-
Test the System:
- Before lifting your bike, test the hoist by operating the crank or pulley mechanism. Ensure it runs smoothly.
- Lift the empty hooks to the ceiling.
- Attach the hooks to your bike.
- Slowly operate the hoist mechanism to lift the bike. The crank allows for controlled lifting.
- Once the bike is at the desired height, engage the locking mechanism on the hoist to keep it in place.
Alternatives to Pulley/Hoist Systems
If a pulley or hoist seems too complex or you prefer a simpler approach, consider these options:
Fixed Ceiling Racks:
These are often simpler to install but require more physical effort to lift the bike.
- How they work: They are usually U-shaped hooks or cradles that screw directly into ceiling joists. You lift your bike, position the frame or wheels into the cradles, and then secure it.
- Installation:
- Locate ceiling joists.
- Determine the spacing needed for your bike’s frame or wheels.
- Mark and drill pilot holes into the joists.
- Screw the rack securely into the joists.
- Pros: Simple, often less expensive, fewer moving parts.
- Cons: Requires significant lifting strength, bike hangs lower if not lifted high enough, can be trickier to get the bike positioned correctly.
Wall Mount Bike Storage:
While not ceiling-mounted, wall mount bike storage is an excellent space saving bike storage alternative if you have a suitable wall.
- Types: Horizontal racks (bike sits parallel to the wall), vertical racks (bike hangs by the front wheel), folding racks.
- Installation: Similar to ceiling mounts – you must secure them to wall studs.
- Pros: Easier to lift the bike onto, good for smaller spaces where ceiling access is difficult.
- Cons: Takes up wall space, bike may stick out from the wall.
Safety First: Critical Considerations
No matter which system you choose, safety is paramount. A falling bike can cause serious damage and injury.
Key Safety Checks:
- Weight Limits: Always adhere to the weight limits specified by the manufacturer for your chosen bike hoist, pulley system, or rack. Remember to factor in the weight of your bike plus any accessories (lights, water bottles, etc.).
- Secure Joist Attachment: This cannot be stressed enough. If your mounting hardware is not screwed firmly into the center of a solid ceiling joist, the entire system could fail.
- Rope Condition: Regularly inspect the ropes on pulley systems for fraying, cuts, or wear. Replace them if they show any signs of damage.
- Hook Security: Ensure the hooks that hold your bike are firmly attached and cannot easily slip off the frame or handlebars.
- Clearance: Make sure there is adequate clearance around the hanging bike, both horizontally and vertically, so you don’t bump into it when walking past.
- Locking Mechanisms: If your hoist or rack has a locking mechanism, ensure it engages properly.
- Children and Pets: Keep children and pets away from the area when you are lowering or raising your bike.
Maintaining Your System:
- Regular Inspections: Make it a habit to visually inspect your entire setup before each use.
- Tighten Hardware: Periodically check that all screws and bolts are still tight. Vibrations can loosen them over time.
- Lubrication: If your hoist has moving parts that require lubrication, follow the manufacturer’s recommendations.
Optimizing Your Overhead Storage
Once you have your bike safely stored, consider these tips for an even better experience.
Tips for Efficient Storage:
- Bike Cover: Use a bike cover to protect your bike from dust and debris, especially if storing it for extended periods.
- Tire Placement: Consider how your tires are positioned. Some people prefer to hang bikes by the wheels, while others prefer by the frame. Different systems accommodate different preferences.
- Multiple Bikes: If you have multiple bikes, consider systems designed for storing more than one, or plan your layout carefully to avoid crowding.
- Attic Bike Storage: If your attic has accessible joists and sufficient height, it can be an excellent place for attic bike storage, keeping bikes completely out of sight and out of the way. Ensure the attic temperature and humidity are suitable for your bike.
Frequently Asked Questions (FAQ)
Q1: Can I hang any type of bike from the ceiling?
A1: Yes, most ceiling storage systems can accommodate various bike types, including road bikes, mountain bikes, hybrids, and even some heavier e-bikes, provided you choose a system rated for their weight. Always check the weight capacity of the product.
Q2: How far apart do ceiling joists usually need to be for bike storage?
A2: The required spacing depends entirely on the specific ceiling bike rack or bike pulley system you purchase. Most systems specify the necessary mounting distance in their instructions. Typically, you’ll be mounting to two parallel joists, often spaced 16 or 24 inches apart on center.
Q3: Is it safe to hang my bike from the ceiling in a rented apartment?
A3: This is a tricky question. While you can technically do it, you absolutely must get permission from your landlord. Furthermore, you must ensure you are only screwing into structural joists and not damaging the ceiling beyond what can be repaired when you move out. If in doubt, a freestanding garage bike storage solution or a non-permanent wall mount bike storage option might be better.
Q4: What is the weight capacity of typical ceiling bike storage systems?
A4: Standard pulley systems and bike hoists are often rated for up to 50 pounds. However, heavier-duty options are available that can handle bikes weighing 70-100 pounds or more. Always check the product specifications.
Q5: Do I need special tools to install a bike pulley system?
A5: Generally, you’ll need a drill, a stud finder, a measuring tape, and a pencil. The kit will come with mounting hardware, but you might want to have your own set of sturdy wood screws on hand as a backup.
Q6: How much space will hanging my bike save?
A6: Hanging your bike vertically or horizontally from the ceiling can free up a significant amount of floor space, often turning a cluttered area into a tidy one. It’s one of the most effective space saving bike storage methods available.
Q7: Can I install a ceiling bike mount myself?
A7: Yes, if you are comfortable with basic DIY tasks and can accurately locate ceiling joists, installing most ceiling bike mounts, pulley systems, or hoists is a manageable DIY project. Always follow the manufacturer’s instructions meticulously.
Q8: What’s the difference between a bike hoist and a bike pulley system?
A8: Both systems use ropes and pulleys to lift your bike. A bike pulley system typically uses a simple rope and cleat system for securing. A bike hoist often includes a pulley system with an integrated crank or locking mechanism for more controlled lifting and securing.
By following these guidelines, you can confidently and safely hang your bike from the ceiling, reclaiming valuable space and keeping your bicycle organized and protected. Enjoy your clutter-free space!