
What is the best way to measure a bike seat? The best way to measure a bike seat is by using your inseam measurement and correlating it to a recommended saddle height range, often found using a simple formula or a bike fit calculator. This guide will walk you through precisely how to measure a bike seat for optimal comfort and performance.
Finding the perfect bike seat height is crucial for an enjoyable and efficient ride. A seat that’s too high or too low can lead to discomfort, pain, and even injury. This comprehensive guide will teach you how to measure your bike seat and adjust it correctly, ensuring you get the most out of every cycling adventure. We’ll cover everything from initial measurements to fine-tuning for ultimate comfort. Let’s dive into the details of how to set bike seat height and achieve that ideal cycling saddle height.
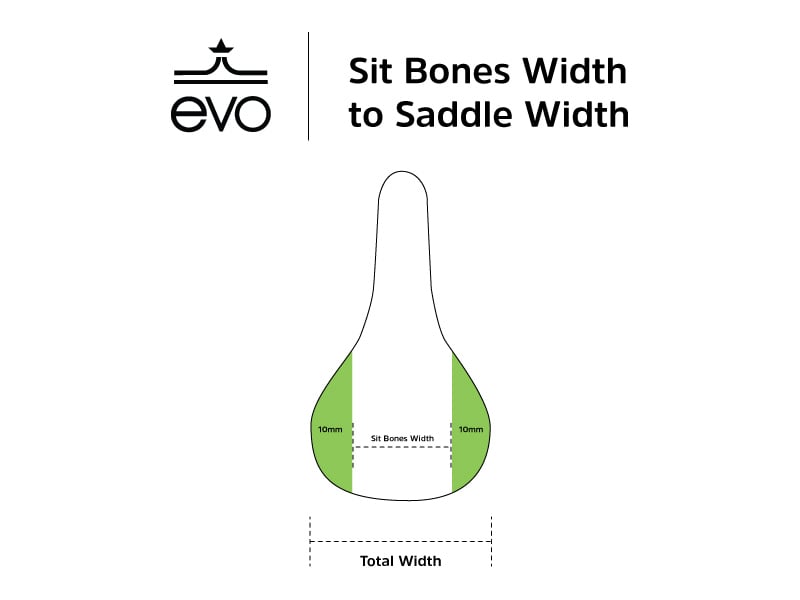
Image Source: static.evo.com
Why Correct Bike Seat Height Matters
Before we get into the specifics of measuring bike saddle height, it’s important to understand why this is so critical.
Comfort on Rides
- Reduced Strain: A properly adjusted seat prevents undue stress on your knees, hips, and lower back.
- Preventing Numbness: The wrong height can lead to pressure points and numbness in your feet and extremities.
- Enjoyable Experience: When your bike fits you well, you’re more likely to ride longer and enjoy the experience more.
Riding Efficiency
- Power Transfer: The correct saddle height measurement allows for optimal leg extension, leading to more efficient power transfer with each pedal stroke.
- Smooth Pedaling: A consistent and correct pedal stroke is facilitated by the right seat height, promoting a fluid pedaling motion.
- Reduced Fatigue: Efficient mechanics mean you use less energy to go the same distance, reducing overall fatigue.
Injury Prevention
- Knee Health: Incorrect bike seat height is a common cause of knee pain, both anterior (front of knee) and posterior (back of knee).
- Hip Alignment: A seat too high can cause your hips to rock, leading to discomfort and potential long-term issues.
- Lower Back Pain: Poor pelvic positioning due to an incorrect seat height can strain your lower back.
Tools You’ll Need
To accurately measure and adjust your bike seat, gather these simple tools:
- Measuring Tape: A standard tape measure or a long ruler.
- Level: A small bubble level can be helpful for ensuring the saddle is horizontal.
- Allen Keys/Wrenches: To loosen and tighten your seatpost clamp.
- A Helper (Optional but Recommended): Someone to hold the bike steady and offer feedback.
- A Wall or Stationary Object: To lean the bike against or to use as a reference point.
Step-by-Step Guide to Measuring Bike Seat Height
This section focuses on how to measure a bike seat accurately. We will use your body’s measurements to find the right starting point for your bicycle seat height guide.
Step 1: Measure Your Inseam
This is the most crucial measurement for determining your optimal bike seat height.
- Stand Barefoot: Remove your shoes and stand with your back against a wall.
- Place a Book or Level: Put a book, ruler, or spirit level between your legs, with the flat edge pressing up firmly into your crotch, simulating the pressure of a bike saddle. Ensure it’s level.
- Mark the Wall: Have a helper mark the top of the book/level on the wall. If you’re alone, carefully slide the book/level out and measure the distance from the floor to the mark.
- Record the Measurement: This is your inseam measurement. Let’s call this “I”.
Step 2: Calculate Your Initial Saddle Height
A common and widely accepted method for calculating your starting saddle height measurement is the following formula:
Saddle Height = Inseam (I) x 0.883
- Why 0.883? This factor comes from biomechanical studies that aim to provide a good balance of leg extension and comfortable pedaling. It accounts for the crank arm length and your ideal knee bend at the bottom of the pedal stroke.
Example: If your inseam is 80 cm:
Saddle Height = 80 cm x 0.883 = 70.64 cm
Important Note: This measurement is from the center of the bottom bracket (the spindle where the cranks attach) to the top of the saddle.
Step 3: Measure Your Current Bike Seat Height
Now, let’s measure your current setup to see how it compares.
- Position the Bike: Stand the bike upright, ideally with the crank arms level or in a neutral position. You can lean it against a wall or have a helper hold it.
- Locate the Bottom Bracket: Find the center of the bottom bracket. This is usually where the crank arms meet the frame.
- Measure to the Saddle Top: Using your measuring tape, measure the distance from the center of the bottom bracket to the top center of the saddle.
- Be Precise: Ensure your tape measure is straight and perpendicular to the ground.
- Saddle Top: Measure to the highest point of the saddle’s seating surface, not the nose or tail.
Alternatively, using pedal position:
If you find measuring from the bottom bracket tricky, you can use the pedal position:
- Position the Crank Arm: Rotate the crank arm so it’s in the forward, “2 o’clock” position.
- Measure to the Pedal: Measure from the center of the pedal axle to the center of the saddle.
- Adjust for Crank Length: Subtract your crank arm length from this measurement. This gives you a rough approximation of the bottom bracket to saddle height. However, the bottom bracket method is more accurate.
Step 4: Compare and Adjust
Compare your calculated ideal saddle height with your current bicycle seatpost height.
- If your current measurement is lower than the ideal: You need to raise your seat. Loosen the seatpost clamp, slide the seatpost up to the desired height, and retighten the clamp.
- If your current measurement is higher than the ideal: You need to lower your seat. Loosen the seatpost clamp, lower the seatpost, and retighten the clamp.
Refining Your Saddle Height: The On-Bike Test
The 0.883 formula provides an excellent starting point, but individual flexibility and pedaling styles can necessitate fine-tuning. This is where the on-bike test comes in for bike fit seat height.
The Knee Angle Test
This is the most common way to check your cycling saddle height adjustment.
- Get On the Bike: Mount your bike and start pedaling gently on a trainer or a flat, safe area.
- Pedal Position: Place your foot in the pedal at the bottom of its stroke.
- Check Your Knee: At the bottom of the pedal stroke, your knee should have a slight bend, typically between 25 to 35 degrees.
- Too Straight: If your leg is almost perfectly straight at the bottom, your saddle is likely too high. You’ll notice your hips rocking side-to-side as you pedal.
- Too Bent: If your knee is significantly bent with very little extension, your saddle is likely too low. You might feel like you’re “spinning out” or not getting enough leverage.
How to Check Knee Angle:
- Visual Check: Have a helper observe your knee angle at the bottom of the stroke.
- Protractors/Apps: You can use a bicycle fit app or a protractor taped to your leg (with a helper’s assistance) for a more precise measurement.
The Heel-to-Pedal Test (For Initial Rough Adjustment)
This is a quick way to get close to the right height if you don’t have a helper or a trainer.
- Mount the Bike: Swing your leg over the bike.
- Back Pedal: While seated, back pedal until one of your cranks is pointing straight down (6 o’clock position).
- Heel Position: Place your heel on the pedal. Your leg should be perfectly straight.
- Normal Pedal Position: When you place the ball of your foot on the pedal in a normal pedaling motion, your leg will then have the desired slight bend (25-35 degrees).
- If your leg is bent with your heel: The saddle is too low.
- If you can’t reach the pedal with your heel: The saddle is too high.
Fine-Tuning Adjustments
Make small adjustments (1-2 mm at a time) and ride for a few minutes to feel the difference.
- If you have knee pain:
- Front of Knee Pain: Often means the saddle is too high. Lower it slightly.
- Back of Knee Pain: Often means the saddle is too low. Raise it slightly.
- If your hips rock: The saddle is too high. Lower it.
- If you feel like you’re not getting enough power or are spinning out easily: The saddle might be too low. Raise it.
- Comfort: Ultimately, your comfort is key. If a measurement suggests a height but it feels wrong, trust your body and make further small adjustments.
Saddle Fore/Aft Position and Tilt
While bike seat height is paramount, the fore/aft position and tilt of your saddle also significantly impact comfort and efficiency.
Saddle Fore/Aft Adjustment
This adjustment moves the saddle forward or backward on its rails.
Knee Over Pedal Spindle (KOPS) Method
This is a common method to set the fore/aft position.
- Position Crank: Place the crank arms parallel to the ground (3 o’clock and 9 o’clock position).
- Hang a String: Hang a plumb bob (a string with a weight) from the bony protrusion on the front of your kneecap (tibial tuberosity).
- Check Alignment: The string should fall directly over the center of the pedal axle.
- If the string is in front of the pedal axle: Move the saddle forward.
- If the string is behind the pedal axle: Move the saddle backward.
Impact of Fore/Aft Position:
- Saddle Forward: Can lead to more pressure on hands and arms, and potentially a more forward, aggressive riding position.
- Saddle Backward: Can lead to a more upright position and may feel more comfortable for climbing.
Saddle Tilt Adjustment
This refers to the angle of the saddle’s surface.
General Guidelines for Saddle Tilt
- Level Saddle: For most riders, a level saddle is the starting point. Use your level on the saddle’s surface.
- Slight Nose-Down: Some riders find a slight downward tilt (1-3 degrees) more comfortable, especially on longer rides, as it can reduce pressure on soft tissues.
- Slight Nose-Up: Rarely recommended. It can cause pressure on the pubic bone and make it harder to achieve a comfortable position.
Impact of Saddle Tilt:
- Nose-Down: Can cause you to slide forward, putting more pressure on your hands and wrists.
- Nose-Up: Can put excessive pressure on your perineum and soft tissues.
How to Adjust Tilt:
Loosen the bolts on the seatpost clamp that hold the saddle. Adjust the tilt, then retighten the bolts evenly.
Common Bike Fit Seat Height Scenarios
Let’s look at some specific scenarios and how bike saddle height adjustment plays a role.
Road Cycling
For road cyclists, efficiency and aerodynamics are key. The optimal bike seat height is often set to allow for maximum power output. A slightly higher saddle setting, within the correct range, is common to achieve full leg extension during the pedal stroke.
Mountain Biking (MTB)
Mountain biking requires versatility. While climbing often benefits from a higher seat for efficiency, descending benefits from a lower seat for maneuverability and a lower center of gravity. Many modern mountain bikes use dropper seatposts, allowing riders to quickly adjust bicycle seatpost height on the fly.
- Climbing: Set for optimal power, similar to road cycling.
- Descending: Lowered significantly for better control and to get the saddle out of the way.
- All-Mountain/Trail Riding: A balance between climbing and descending, often with a compromise setting or a dropper post.
Gravel Riding
Gravel riding combines elements of road and mountain biking. The bike fit seat height needs to accommodate varied terrain. A slightly lower saddle than a pure road bike can offer more stability on rough surfaces, while still being high enough for efficient pedaling on smoother sections.
Commuting and Touring
For commuting and touring, comfort is often prioritized over peak performance. A slightly lower saddle height measurement might be preferred to allow for a more upright posture and easier dabbing of feet on the ground.
Advanced Considerations: Professional Bike Fit
While these methods are excellent for DIY adjustments, a professional bike fit can provide a more personalized and comprehensive approach to bike fit seat height and overall riding position. A bike fitter will use advanced tools and their expertise to analyze your biomechanics, flexibility, and riding goals to dial in every aspect of your bike setup.
What a Professional Bike Fit Entails:
- Pre-Fit Interview: Discussing your cycling history, comfort issues, and goals.
- Physical Assessment: Evaluating your flexibility, posture, and any imbalances.
- Static Measurements: Using tools to precisely measure your body and transfer those to the bike.
- Dynamic Fit: Observing you ride on a trainer or the road, making adjustments to bike seat height, handlebar position, cleat position, and more.
- Tools Used: Gonio meters (for angles), motion capture systems, specialized pressure mapping devices, and of course, precise measuring tools.
If you experience persistent pain or are looking to maximize your performance, a professional bike fit is a worthwhile investment. They will ensure your bicycle seat height guide is perfectly calibrated to you.
Frequently Asked Questions (FAQ)
Q1: How do I know if my bike seat is too high?
Signs your bike seat height is too high include:
* Your hips rocking side-to-side as you pedal.
* Your leg feeling almost completely straight at the bottom of the pedal stroke.
* Pain in the back of your knee.
* Difficulty in reaching the pedals smoothly.
Q2: How do I know if my bike seat is too low?
Signs your bike seat height is too low include:
* Your knee having a significant bend at the bottom of the pedal stroke.
* Feeling like you’re “spinning out” or can’t generate enough power.
* Pain in the front of your knee.
* Your quadriceps feeling overworked quickly.
Q3: What is the best way to measure my bike seat height?
The best way to measure your bike seat height is to measure the distance from the center of the bottom bracket to the top center of the saddle. You can use your inseam measurement and multiply it by 0.883 as a starting point.
Q4: Can I use a different formula for saddle height?
Yes, there are other formulas and methods, such as using a percentage of your total leg length or specific recommendations for different cycling disciplines. The 0.883 inseam multiplier is a widely accepted and effective starting point for many cyclists. However, individual biomechanics can vary, so on-bike testing is always recommended for fine-tuning.
Q5: How often should I check my bike seat height?
It’s a good practice to check your bike saddle height adjustment periodically, especially if you’ve had changes in your fitness, flexibility, or if you experience any new discomfort. After any significant bike maintenance or component changes, re-checking your fit is also advisable.
Q6: Does crank arm length affect saddle height?
Yes, crank arm length is a factor in determining the ideal saddle height measurement. The 0.883 formula indirectly accounts for a standard crank arm length. If you have significantly longer or shorter cranks than average, you may need to make minor adjustments to your calculated saddle height. A professional bike fit will always consider your crank arm length.
Q7: My bike seat keeps slipping down, what should I do?
If your seatpost is slipping, ensure the seatpost clamp is adequately tightened. You can also use carbon fiber paste (if you have a carbon seatpost and frame) or a light layer of grease (for metal components) to improve grip. If it continues to slip, the clamp or seatpost itself might be worn or damaged and may need replacement.
By following this detailed guide on how to measure a bike seat, you can achieve a more comfortable, efficient, and enjoyable cycling experience. Remember to make small adjustments and listen to your body to find your perfect cycling saddle height.