
Can you patch a bike tube with household items? Yes, you can, but it’s best for emergencies. While dedicated bike patch kits are ideal for a lasting bike tire repair, knowing how to do a bicycle inner tube fix in a pinch can save your ride. This guide will walk you through a DIY bike puncture using everyday items. We’ll cover what you need, how to do it, and what to expect from your makeshift bike patch. This is all about emergency bike repair when you’re far from a bike shop or your household puncture kit is empty. Mastering these techniques is a key part of bicycle maintenance home.
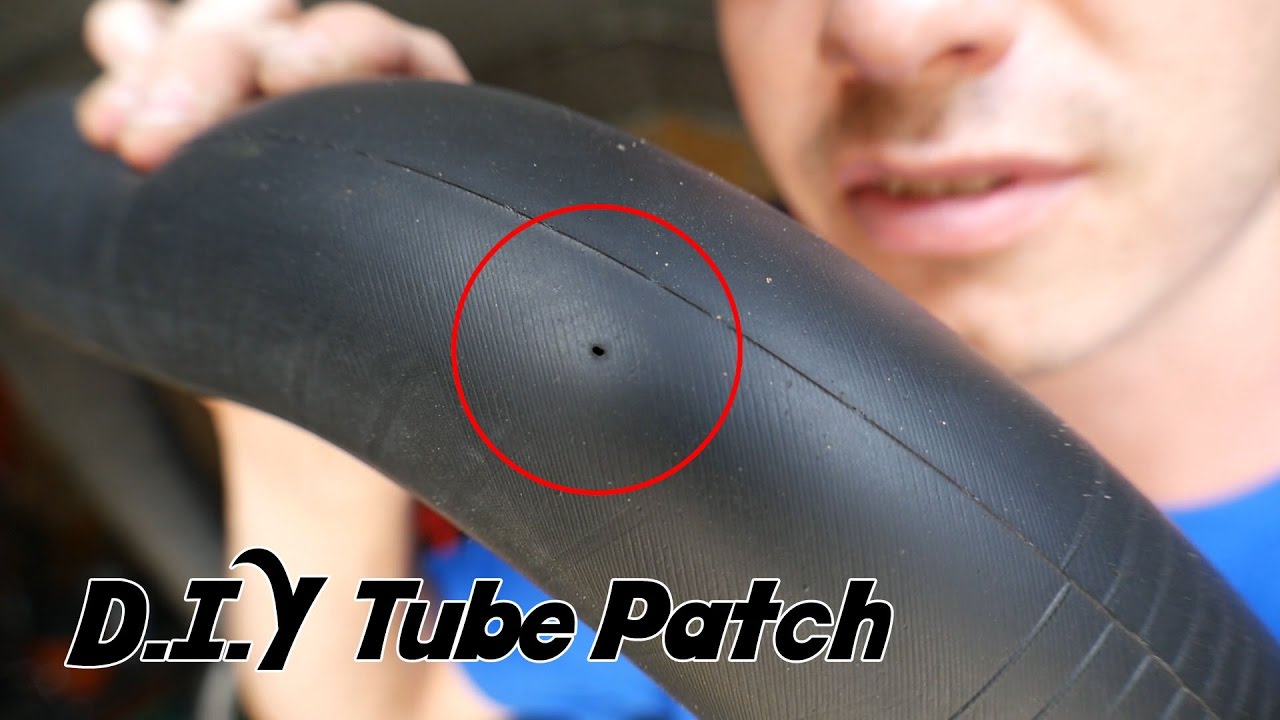
Image Source: i.ytimg.com
Your Emergency Bike Tool Kit: What You Need at Home
When you get a flat, especially if you’re on a trail or a long ride, a quick bike fix is essential. You might not have a proper patch kit with you. But don’t worry! Many common household items can help you achieve a bicycle inner tube fix. The goal here isn’t a permanent solution, but a way to get you home or to a place where you can get a proper repair.
Here’s what you should look for in your home to create a temporary patch:
- The Patch Material: This is the most crucial part. You need something thin, waterproof, and flexible that can stick to the rubber of your inner tube.
- Duct Tape: The king of emergency repairs! Its strong adhesive and waterproof nature make it a surprisingly effective temporary patch. Use a small piece, but a good quality, strong duct tape.
- Heavy-duty Packing Tape: Similar to duct tape, it offers good adhesion and a waterproof barrier.
- Contact Cement (or Super Glue): While not a tape, a small amount of strong glue can seal a small puncture if applied correctly. Think along the lines of what you might use for shoe repair or craft projects.
- Inner Tube Rubber (from an old tube): If you have a spare old tube, you can cut a small piece from it to use as a patch. This is the closest you’ll get to a proper repair with household items.
- Thick Plastic Bags (like a strong ziplock or grocery bag): In a real bind, a piece of a thick, sturdy plastic bag can be used, though adhesion will be the main challenge.
- Adhesive: How will you make your patch stick?
- Contact Cement/Super Glue: If you chose glue as your patch material, this is your adhesive.
- Duct Tape/Packing Tape: These are self-adhesive.
- For a Rubber Patch: You’ll need rubber cement or a strong, waterproof glue. If you have a puncture repair kit, you’d use the vulcanizing fluid. Without it, a strong, flexible glue that dries clear or white is your best bet. Craft glue or even a strong, waterproof school glue can work in a pinch.
- Tools for Preparation:
- Tire Levers: While not strictly household items, they are bike-specific. If you don’t have them, you might need to improvise. A flat, sturdy object like a butter knife (carefully!) or even a strong credit card can sometimes work, but be very gentle to avoid damaging the rim or tube further.
- Something to Clean the Area: Rubbing alcohol (hand sanitizer works in a pinch), or even a bit of spit and a clean cloth will do. The cleaner the surface, the better the patch will stick.
- A Sharp Object (for cleaning/shaping): A small knife or even scissors to trim your patch material if needed.
- Tools for Inflation:
- Bike Pump: Essential for re-inflating the tire. If you don’t have one, you’re in a tough spot. CO2 cartridges are common for cyclists, but not household items.
Step-by-Step Guide to Your Makeshift Bike Patch
Let’s get down to the nitty-gritty of fixing a flat bike tire with what you have at home. This process requires patience and a careful hand.
Step 1: Removing the Wheel and Tire
First, you need to get the wheel off your bike.
* If it’s the rear wheel, shift your gears to the smallest cog on the cassette. This makes removing and re-installing the wheel easier.
* Use your quick-release lever or wrench to loosen the axle nuts.
* Carefully lift the bike or pull the wheel out of the dropouts.
Now, to access the tube:
* Deflate the tire completely. Press the valve core (if it’s a Presta valve, unscrew the small nut first).
* Use your tire levers to carefully pry one side of the tire bead off the rim. Start opposite the valve. Work your way around the rim. Be gentle to avoid pinching the tube further or damaging the tire.
* Once one side is off, you can usually pull the tube out from the other side, leaving the tire on the rim. If you need to remove the tire entirely, repeat the process on the other side.
Step 2: Finding the Puncture
This is a detective job!
* Inflate the tube slightly. You want it firm enough to hear or feel air escaping, but not so full that it’s hard to handle.
* Listen and Feel: Hold the tube close to your ear and run it along your cheek or the back of your hand. You’re looking for a hiss of air or a cool draft.
* The Water Test (if available): If you have a water bottle or access to a puddle, submerge sections of the tube in water. Bubbles will clearly indicate the leak’s location.
* Mark the Hole: Once you find the puncture, mark it clearly with a pen or chalk. A small “X” is perfect.
Step 3: Preparing the Tube for the Patch
Cleanliness is key for a good seal, even with makeshift materials.
* Clean the Area: Around the puncture mark, you need a clean, dry surface. Use a rag, paper towel, or even a clean piece of cloth. If you have rubbing alcohol or hand sanitizer, use it to wipe the area. This removes dirt, oil, and moisture that could prevent the patch from sticking.
* Rouge the Surface (Optional but Recommended): If you have something mildly abrasive, like a piece of sandpaper from a household puncture kit or even a rough side of a multitool, gently scuff the area around the puncture. This creates a slightly rough surface for the adhesive to grip onto better. Be gentle; you don’t want to make the hole bigger or thin the rubber too much.
Step 4: Applying Your Makeshift Patch
Now for the moment of truth! The method depends on what material you are using.
Method 1: Duct Tape or Packing Tape Patch
This is often the easiest DIY bike puncture solution.
- Cut Your Patch: Cut a piece of duct tape or packing tape that is about 1 inch (2.5 cm) larger than the puncture in all directions. Rounding the corners can help prevent it from peeling up later.
- Apply the Tape: Peel off the backing (if any) and carefully center the tape over the puncture. Press it down firmly, working from the center outwards to push out any air bubbles. Make sure the edges are well adhered.
- Add a Second Layer (Optional but Recommended): For extra security, especially with duct tape, you can add a second piece of tape, overlapping the first slightly. This creates a more robust barrier.
Method 2: Rubber Patch with Glue
This method is closer to a real bicycle inner tube fix.
- Cut Your Patch: Cut a piece of rubber from an old inner tube. Make it about 1 inch (2.5 cm) larger than the puncture. Again, round the edges.
- Apply Adhesive: If you’re using contact cement or super glue, apply a thin, even layer to the scuffed area on the inner tube. Then, apply a layer to the rubber patch. Wait for the adhesive to become tacky (follow the product instructions – usually a few minutes).
- Press and Hold: Carefully place the rubber patch over the puncture. Press down firmly, working from the center outwards. Hold it in place for at least a minute or two to ensure good adhesion.
- Let it Cure: If using a stronger glue, it’s best to let it cure for at least 15-30 minutes before attempting to inflate the tube. This might be impractical in an emergency, but longer is better.
Method 3: Glue Only (for tiny holes)
If the puncture is very small and you have strong glue like super glue or contact cement, you might be able to seal it directly.
- Prepare the Area: Clean and scuff the area around the hole as described above.
- Apply Glue: Apply a small amount of glue directly to the hole. You might want to use a toothpick or a thin applicator.
- Press the Edges: Gently press the rubber edges of the hole together.
- Let it Dry: Allow the glue to dry completely. This might take a few minutes.
Step 5: Re-installing the Tube and Tire
Putting everything back together.
- Slightly Inflate the Tube: Before putting the tube back in the tire, inflate it just enough to give it some shape. This makes it easier to place and prevents it from twisting or getting pinched.
- Insert the Tube: Place the valve stem through the valve hole in the rim first. Then, tuck the rest of the slightly inflated tube into the tire, working your way around the wheel. Ensure the tube isn’t twisted.
- Re-seat the Tire: Starting opposite the valve, use your hands to push the tire bead back onto the rim. Work your way around both sides. The last section near the valve can be the trickiest. If it’s too difficult, you might need tire levers, but be extremely careful not to pinch the tube with the levers.
- Check for Pinches: Before fully inflating, go around the tire on both sides, pushing the tire bead towards the rim to ensure the tube isn’t caught between the tire and the rim anywhere. This is a common cause of new flats.
Step 6: Inflate and Test
The final step for your emergency bike repair.
- Inflate the Tire: Use your bike pump to inflate the tire to your desired pressure. Check the sidewall of your tire for recommended pressure ranges.
- Check the Patch: While inflating, keep an eye on the patch. Does it look like it’s holding? Does the tire inflate evenly?
- Spin the Wheel: Once inflated, spin the wheel to ensure it’s seated correctly and doesn’t wobble.
- Ride Cautiously: Your makeshift patch should hold for a while, but it’s not as reliable as a proper patch. Ride gently and avoid hard braking or sharp turns, especially in the initial stages, to ensure the patch stays put.
When a Makeshift Patch Isn’t Enough: Valve Stem Repair and Other Issues
Sometimes, the problem isn’t a hole in the tube itself but an issue with the valve stem repair.
Valve Stem Problems
- Loose Valve Core: For Presta valves, the small nut at the tip of the valve can sometimes loosen. Try tightening it gently with your fingers.
- Damaged Valve Stem: If the valve stem itself is torn or cracked, a household patch won’t fix it. This usually requires a new inner tube.
- Valve Leaking: Sometimes, the valve can leak even if it’s not loose. For Schrader valves (car-type), you can try tightening the core with a valve core tool or pliers. For Presta valves, if the core itself is leaking, it usually means the tube needs replacing.
Other Considerations for DIY Bike Puncture
- Tire Damage: If the object that caused the flat has also cut or damaged the tire casing, you’ll need to repair the tire as well. A piece of sturdy cloth, a piece of old inner tube, or even a few layers of duct tape on the inside of the tire can act as a temporary boot to prevent the tube from bulging through the cut.
- Rim Tape: Ensure your rim tape is in good condition. If the spoke holes are exposed or the tape is damaged, sharp edges can cause flats. This is part of bicycle maintenance home.
Pros and Cons of Household Item Patches
| Aspect | Pros | Cons |
|---|---|---|
| Availability | Uses items commonly found around the house, great for emergency bike repair. | May not have the ideal materials; quality and reliability can vary greatly. |
| Cost | Free or very low cost. | None specific to cost. |
| Speed | Can be a quick bike fix to get you moving again. | Finding materials and performing the repair can still take time, especially if you’re not experienced. |
| Reliability | Unpredictable. Can get you home but might not be a long-term solution. | Less durable than professional patches. High risk of the patch failing under stress or over time. |
| Tube Lifespan | May permanently damage the tube if adhesive is too strong or applied incorrectly, or if the hole is enlarged. | A proper patch kit is designed to bond with the tube, preserving its integrity. |
| Performance | Can feel less smooth or cause a slight wobble if the patch is bulky. | None specific to performance. |
| Environmental | Reusing existing materials can be seen as positive, but the temporary nature might lead to more waste if it fails quickly. | The adhesives used might not be environmentally friendly, and the temporary patch might fail, requiring disposal. |
| Learning Curve | Relatively simple if using tape; slightly more complex with glue. | Requires care and precision to be effective. |
| Ideal Use | Emergency bike repair to get you home or to a bike shop. | Not recommended for serious or extended riding; a proper patch kit or new tube is always best for reliable bike tire repair. |
When to Ditch the Makeshift Patch
While this guide is about using household items, it’s crucial to know when to stop.
- Large Tears: If the puncture is a long slit or a significant tear in the tube, no makeshift patch is likely to hold reliably.
- Multiple Punctures: If you have several small holes close together, the tube’s integrity might be compromised.
- Tire Damage: As mentioned, if the tire itself is damaged, a tube patch won’t solve the problem.
- Unreliable Adhesion: If you can tell your patch isn’t sticking well or is already peeling, don’t risk it.
- Critical Riding: If you’re on a very long ride, in a remote area, or need absolute certainty, a proper patch kit or a new tube is always preferable.
Your DIY bike puncture attempt is a temporary fix. Once you get home or to a bike shop, you should properly patch the tube with a dedicated kit or replace it entirely. This ensures safety and reliability for your future rides.
Frequently Asked Questions (FAQ)
Q1: What’s the absolute best household item to use for a bike tube patch?
A1: Duct tape is generally considered the most reliable household item for a temporary bike tube patch due to its strong adhesive and waterproof nature.
Q2: Can I just use glue without a patch material?
A2: For very small pinprick holes, sometimes a strong, flexible glue like super glue or contact cement can work as a seal if you can press the rubber edges together. However, it’s less reliable than using a patch material.
Q3: How long will a makeshift patch last?
A3: This varies greatly. It could last for a short ride or several days, but it’s never as reliable as a proper patch. It’s always best to get a proper repair or replacement as soon as possible.
Q4: Will this damage my bike tire or tube?
A4: If done carefully, it shouldn’t permanently damage your tube. However, aggressive adhesives or improper application (like pinching the tube with tire levers) can cause further damage.
Q5: What if I don’t have tire levers?
A5: You can try using a flat, sturdy object like a credit card or a butter knife, but be extremely careful not to damage the tire bead or the tube. Some people have even used strong fingernails in a pinch.
Q6: Is this a good idea for my road bike?
A6: Road bikes often have higher tire pressures, which puts more stress on any patch. While a makeshift patch might work for a short distance, it’s especially important to get a proper repair for road biking to ensure safety.
Q7: How do I perform a valve stem repair on my bike?
A7: For a loose Presta valve core, gently tighten it with your fingers. If the core itself is leaking or the stem is damaged, replacement of the inner tube is usually required. Schrader valves can sometimes be fixed by tightening the core with pliers.
This comprehensive guide equips you with the knowledge to tackle a flat tire using common items. Remember, practice makes perfect, and having a good household puncture kit readily available is always the best strategy for bicycle maintenance home.