
Can you stop brakes from squeaking on a bike? Yes, you absolutely can stop your bike brakes from squeaking. This guide will help you fix squeaky bike brakes and achieve quiet bike brakes by detailing troubleshooting bike brakes, brake pad maintenance bike, and brake lubrication bike techniques.
That high-pitched whine coming from your bike as you brake can be incredibly annoying. It’s more than just an auditory nuisance; bike brake noise can sometimes indicate an underlying issue that needs addressing. Fortunately, most of the time, squeaky bike brakes are a common problem with straightforward solutions. Whether you have squeaky disc brakes bike setups or are dealing with noisy rim brakes bike, this comprehensive guide will walk you through the steps to achieve quiet bike brakes. We’ll cover everything from basic cleaning to more in-depth adjustments, ensuring you can enjoy silent, effective braking.
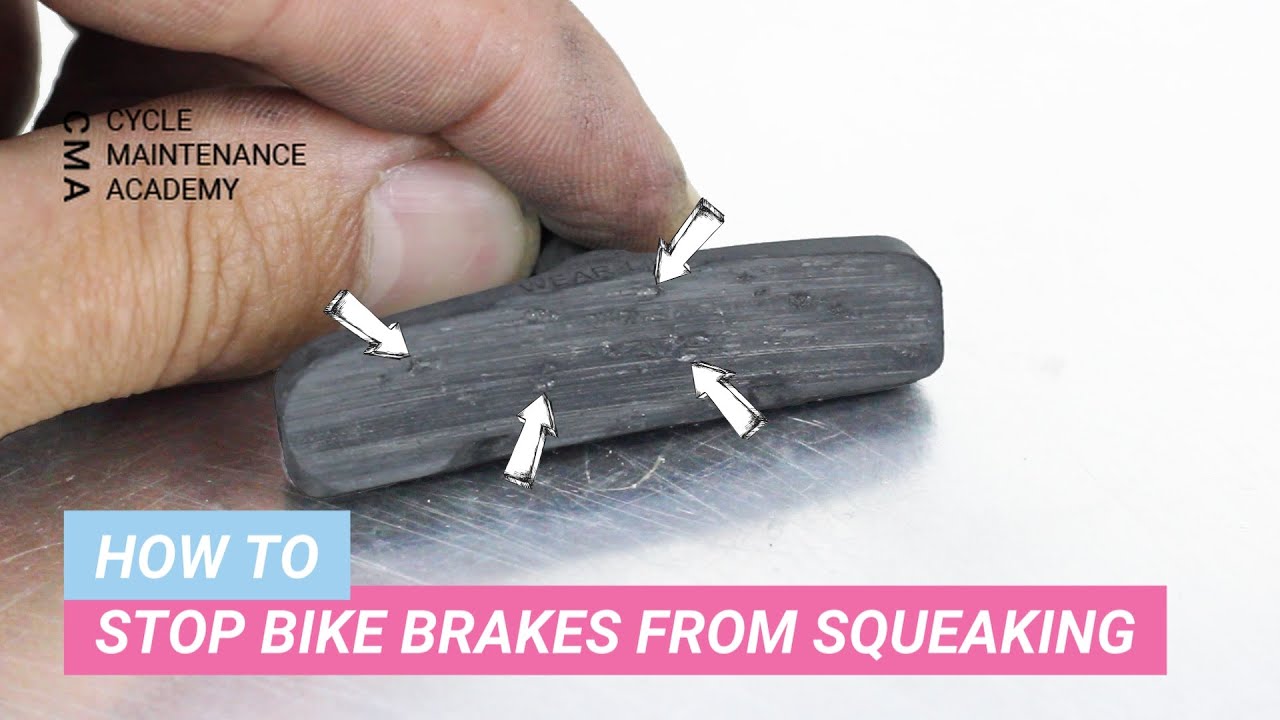
Image Source: i.ytimg.com
Why Do Bike Brakes Squeak?
Before we dive into fixing the squeak, let’s briefly explore why it happens. Bike brake noise is typically caused by vibrations. When the brake pads contact the rotor (for disc brakes) or the rim (for rim brakes), friction is generated. If this friction causes a rapid vibration, it can translate into that irritating squeal. Several factors can contribute to these vibrations.
Common Causes of Brake Squeal
- Contaminated Brake Pads or Rotors/Rims: This is perhaps the most frequent culprit. Oil, grease, dirt, or even brake fluid can get onto your brake surfaces. This contamination changes the friction characteristics, leading to uneven contact and vibrations.
- Glazed Brake Pads: Over time, the surface of the brake pads can become hardened or “glazed” due to heat and repeated friction. A glazed surface is smoother and can cause inconsistent contact, resulting in noise.
- Misaligned Brake Calipers or Levers: If your brake calipers aren’t perfectly aligned with the rotor or rim, they can make uneven contact. This misalignment forces the pads to flex or scrub against the braking surface, creating noise.
- Worn Brake Pads: Severely worn brake pads may not have enough material to make proper contact. This can lead to metal-on-metal contact or uneven application, both of which can cause squeaking.
- Improper Brake Pad Bedding-In: For new brake pads (especially for disc brakes), a proper bedding-in process is crucial. This process ensures the pad material is evenly transferred to the rotor surface, creating a consistent braking surface. Skipping this step can lead to noise.
- Moisture and Debris: While less common for persistent squeaks, water, mud, or grit can temporarily cause noise, especially after riding in wet conditions.
- Pad Material: Some brake pad compounds, particularly metallic or semi-metallic pads, can be inherently noisier than organic (resin) pads, especially when wet.
- Loose Components: Although rare, a loose brake caliper, rotor, or even a loose wheel can sometimes contribute to vibrations that manifest as brake noise.
Troubleshooting Bike Brakes: A Step-by-Step Approach
To fix squealing bicycle brakes, we need to systematically go through potential causes. This troubleshooting process will help you pinpoint the exact reason for the noise and apply the correct solution.
Step 1: Inspect and Clean Your Braking Surfaces
This is the most crucial first step. Contamination is a primary driver of bike brake noise.
Cleaning Rim Brakes
- Remove the Wheels: This gives you better access to the rims and brake pads.
- Clean the Rims: Use a clean rag and rubbing alcohol (isopropyl alcohol) or a dedicated rim cleaner. Wipe down the entire braking surface of the rim thoroughly. Make sure to get both sides.
- Inspect Brake Pads: Check your brake pads for any embedded debris like small stones or metal shards. You can use a small pick or a soft brush to gently remove any visible contaminants. Also, look for signs of glazing – a shiny, hardened surface.
- Clean Brake Pads (if necessary): If the pads look dirty but aren’t glazed, you can try cleaning them with rubbing alcohol. For glazed pads, you might need to lightly sand them.
Cleaning Disc Brakes
- Remove the Wheels: Similar to rim brakes, removing the wheels provides easier access.
- Clean the Rotors: Use a dedicated disc brake cleaner or rubbing alcohol. Spray a generous amount onto a clean, lint-free rag and wipe down both sides of the rotor. Spin the wheel to ensure you’ve cleaned the entire surface. Never touch the rotor surface with your bare fingers, as skin oils can contaminate them.
- Inspect Brake Pads: Remove the brake pads from the caliper. This usually involves removing a retaining pin or bolt. Examine the pad surface for oil, grease, or glazing.
- Clean or Replace Brake Pads:
- For Contamination: If the pads are contaminated with oil or grease, you can try cleaning them with rubbing alcohol. Let them dry completely.
- For Glazing: If the pads are glazed, you’ll need to lightly sand the surface. Use fine-grit sandpaper (around 200-400 grit) to gently scuff the pad surface until the shiny glaze is removed. Again, clean off any dust with alcohol.
- Replacement: If the pads are severely worn, contaminated beyond cleaning, or show signs of damage, it’s best to replace them. This is often the most effective solution for persistent squeaking.
Step 2: Check Brake Pad Alignment
Proper alignment ensures the brake pads contact the braking surface evenly.
Rim Brake Pad Alignment
- Angle: The brake pads should hit the rim squarely. Look from the front and rear. There should be no significant toe-in (front of the pad hitting first) or toe-out (rear of the pad hitting first). A slight toe-in (where the leading edge of the pad contacts the rim slightly before the trailing edge) is often preferred as it can reduce squealing and improve braking modulation.
- Height: The pads should contact the rim’s braking track, not the tire sidewall or the spokes.
- Adjustment: Most rim brake calipers have adjustment screws or nuts. You can loosen the brake pad mounting bolt slightly and adjust the pad position. Tighten the bolt once alignment is correct.
Disc Brake Pad Alignment
- Caliper Position: With the wheel installed, squeeze the brake lever firmly. This action should center the caliper over the rotor. While holding the lever, tighten the caliper mounting bolts. Release the lever and check that the rotor spins freely without rubbing the pads. If it still rubs, you’ll need to manually loosen the caliper bolts and adjust its position until the rubbing stops.
- Pad Orientation: Ensure the brake pads are installed correctly within the caliper. They should be parallel to the rotor surface.
Step 3: Bedding-In New Brake Pads (Crucial for Disc Brakes)
If you’ve cleaned your existing pads or installed new ones, the bedding-in process is vital for optimal performance and to prevent squeaky disc brakes bike issues.
Process for Disc Brakes:
- Find a Safe, Open Area: You’ll need space to accelerate and brake.
- Accelerate Gently: Ride your bike to a moderate speed (around 10-15 mph).
- Brake Firmly (but not to a complete stop): Apply the brake hard enough to slow down significantly, but don’t lock up the wheel.
- Repeat: Do this about 10-20 times for each brake.
- Cool Down: Ride for a few minutes without braking to allow the brakes to cool down.
- Purpose: This process transfers a thin, even layer of pad material onto the rotor, creating a consistent braking surface that minimizes vibrations and noise.
For Rim Brakes: While not as critical as disc brakes, a few firm stops on new rim brake pads can also help them seat properly.
Step 4: Check for Glazed Brake Pads and Sand Them
As mentioned earlier, glazed pads are a common cause of bike brake noise.
- Identification: Glazed pads appear shiny and hard. You might also notice a distinct squeal that is more pronounced when the brakes are slightly damp.
- Sanding:
- Remove the brake pads.
- Use fine-grit sandpaper (200-400 grit).
- Gently sand the surface of the pads until the shiny glaze is gone and the surface looks matte.
- Clean the pads with rubbing alcohol to remove any dust.
- Reinstall the pads.
Step 5: Consider Brake Pad Lubrication (Use with Extreme Caution!)
Brake lubrication bike is a tricky subject. Never lubricate disc brake rotors or pads. The only place a specialized lubricant might be considered is on the mounting points of the brake pads within the caliper (for disc brakes) or on the brake pad mounting post (for rim brakes) to prevent vibration transferring through the mounting hardware.
- Disc Brake Caliper Piston and Pad Backing: A very tiny amount of high-temperature brake lubricant (specifically designed for disc brakes, often ceramic-based) can be applied to the backside of the brake pads (the metal part that contacts the caliper piston) or the caliper piston itself. This can help dampen vibrations. Crucially, ensure no lubricant gets onto the pad friction material or the rotor.
- Rim Brake Pad Mounts: A tiny dab of anti-seize compound or grease on the threads or mounting surfaces of rim brake pads where they attach to the brake arms can sometimes help. Again, avoid getting any on the braking surface.
Important Note: If you are unsure about brake lubrication, it is best to skip this step. Incorrect lubrication can lead to brake failure or increased noise.
Step 6: Check for Worn Brake Pads
Worn brake pads are a safety hazard and a source of noise.
- Rim Brake Pads: Most rim brake pads have wear indicator lines. When the pad material wears down to these lines, it’s time for replacement.
- Disc Brake Pads: Visually inspect the pad material. There’s usually a minimum thickness specified by the manufacturer (often around 1mm). If the pad material is significantly thinner than the metal backing plate, they need replacing.
Step 7: Check for Loose Components
While less common, loose parts can induce vibrations.
- Caliper Mounting Bolts: Ensure your brake calipers are securely fastened.
- Rotor Bolts (Disc Brakes): Check that the bolts holding the rotor to the wheel hub are tight.
- Wheel Skewers/Thru-Axles: Make sure your wheels are properly secured in the dropouts.
Specific Tips for Noisy Rim Brakes Bike
Noisy rim brakes bike setups often suffer from:
- Uneven Rim Surface: Damage, heavy wear, or corrosion on the rim’s braking track can cause noise. Cleaning is essential, but if the rim is damaged, replacement might be necessary.
- Contaminated Pads: As discussed, oil, grease, or rubber debris from worn-out pads can build up.
- Pad Material Build-up: Sometimes, rubber from old tires or mud can get embedded in the pads. A good cleaning or light sanding is usually effective.
- Cable Friction: If the brake cable is stiff or corroded, it can lead to jerky braking and noise. Lubricating the cable housing can help.
Specific Tips for Squeaky Disc Brakes Bike
Squeaky disc brakes bike systems have their own set of common issues:
- Rotor Material: Some rotor materials or finishes are more prone to noise.
- Pad Compound: As mentioned, metallic or semi-metallic pads can be louder, especially when wet. If noise is a major concern, consider switching to organic (resin) pads if your system is compatible.
- Brake Fluid Contamination: If brake fluid leaks and contaminates the pads and rotor, it can cause persistent noise. This usually requires replacing the pads and cleaning the rotor thoroughly. In severe cases, bleeding the brakes might be necessary.
- Warped Rotors: A slightly warped rotor can cause the pads to make inconsistent contact, leading to noise. You can often visually inspect for a slight wobble. Minor warping can sometimes be straightened, but severe warping requires rotor replacement.
Brake Pad Maintenance Bike: Long-Term Strategies
Consistent brake pad maintenance bike practices will prevent future squeaks.
- Regular Cleaning: Clean your rims or rotors and pads regularly, especially after riding in wet or dirty conditions.
- Inspect Pads Often: Make it a habit to check your brake pad wear and look for contamination during your regular bike checks.
- Proper Bedding-In: Always bed in new pads correctly.
- Avoid Contamination: Be mindful of where you spray lubricants or cleaning solvents on your bike. Keep them away from your braking surfaces.
Can I Lubricate Bike Brakes?
Yes, but only specific parts with specific lubricants, and with extreme caution.
- Disc Brakes: A tiny amount of high-temperature, silicone-based or ceramic-based brake lubricant can be applied to the backside of the brake pads (where they meet the caliper piston) and the caliper pistons themselves. This helps dampen vibrations transmitted through the pads. NEVER lubricate the pad friction material or the rotor.
- Rim Brakes: Lubrication is generally not recommended for the braking surfaces. You might consider a tiny amount of anti-seize compound or light grease on the brake pad mounting bolts or the post the pad attaches to to prevent seizing and vibration. Again, keep it away from the braking surface.
Consequences of Incorrect Lubrication:
* Reduced Braking Power: Lubricant on the braking surface acts like an oil slick, drastically reducing friction and making your brakes ineffective.
* Brake Failure: In severe cases, lubricant can compromise the entire braking system.
* Increased Noise: Ironically, incorrect lubrication can sometimes worsen brake squeal.
What If My Brakes Are Still Squeaking?
If you’ve tried all the above steps and your brakes are still making noise, here are a few more possibilities:
- Pad Material Compatibility: Ensure your brake pads are compatible with your rotors (for disc brakes) or rims. Some aftermarket pads might not perform as well as OEM options.
- Brake Fluid Issues (Hydraulic Disc Brakes): Air in the hydraulic lines or old brake fluid can cause inconsistent braking and noise. This might require a brake bleed.
- System Contamination: In rare cases, brake fluid might have leaked internally and contaminated the system. This can be difficult to fix without professional help.
- Warped Rotor (Disc Brakes): If you suspect a warped rotor, a bike mechanic can often assess and potentially fix minor warps, or replace the rotor if necessary.
- Worn Caliper Pistons (Disc Brakes): Damaged or excessively worn caliper pistons can cause noise.
- Frame or Fork Resonance: Very rarely, the frame or fork itself might resonate with the brake vibrations, causing noise. This is extremely uncommon.
When to Seek Professional Help
If you’re not comfortable performing these steps, or if you’ve tried everything and the squeaking persists, it’s time to take your bike to a qualified bike mechanic. They have specialized tools and experience to diagnose and fix even the most stubborn brake noise issues. They can also ensure your brakes are functioning safely and effectively.
Frequently Asked Questions (FAQ)
Q1: How often should I clean my bike brakes?
A1: It’s good practice to clean your brakes at least every few months, or more frequently if you ride in wet, muddy, or dusty conditions. A quick wipe-down of the braking surfaces after a particularly dirty ride can go a long way.
Q2: Can I use WD-40 on my bike brakes?
A2: Absolutely not! WD-40 is a solvent and lubricant. Spraying it anywhere near your brake pads, rotors, or rims will contaminate them, drastically reduce braking power, and likely cause persistent squealing.
Q3: My disc brakes squeak when wet, is that normal?
A3: It’s quite common for disc brakes, especially those with metallic or semi-metallic pads, to make a bit of noise when wet. This usually subsides once the brakes dry out. If the noise is very loud or persists long after the bike has dried, it might indicate contamination or an alignment issue.
Q4: My rim brakes make a squealing sound. What’s the easiest fix?
A4: The easiest and most common fix for noisy rim brakes is to thoroughly clean the rims and the brake pads with rubbing alcohol. Also, check if the brake pads have any embedded debris or are glazed.
Q5: Do I need to replace my brake pads if they squeak?
A5: Not necessarily. Squeaking can often be resolved by cleaning, proper alignment, or lightly sanding glazed pads. However, if your pads are visibly worn down to their minimum thickness, or if cleaning and sanding don’t resolve the issue, then replacement is likely necessary.
By following these steps and performing regular maintenance, you can banish that annoying bike brake noise and enjoy smooth, quiet bike brakes on all your rides. Happy cycling!