
Can you pressure wash a dirt bike? Yes, you can pressure wash a dirt bike, but it’s crucial to use the correct technique and pressure to avoid damaging sensitive components. This guide will walk you through the best way to wash your dirt bike, ensuring it stays in top condition for your next off-road adventure. Proper dirt bike cleaning is essential for longevity and performance.
Washing your dirt bike is more than just making it look good; it’s a vital part of off-road bike maintenance. Regular cleaning helps you spot potential issues like loose bolts, cracked hoses, or worn-out parts before they cause a breakdown. Plus, a clean bike is a happy bike, and it makes working on it much more pleasant. Let’s dive into the detailed process of dirt bike detailing.
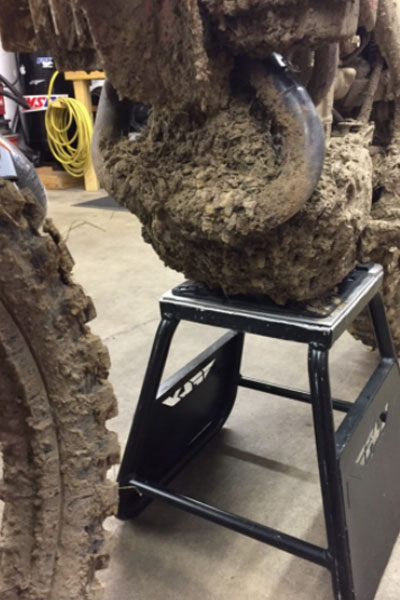
Image Source: blog.amsoil.com
Gathering Your Supplies: What You’ll Need for Dirt Bike Cleaning
Before you start, having the right tools makes the job much easier. Think of this as assembling your pit crew for a thorough cleaning session.
Essential Cleaning Agents
- Degreaser: Crucial for tackling grease and grime, especially on the engine and drivetrain.
- Bike-Specific Wash Soap: A pH-neutral soap formulated for motorcycles prevents stripping protective waxes or finishes.
- Chain Cleaner: If you’re cleaning a chain-driven bike, this is a must-have.
- Tire Cleaner: Helps remove stubborn dirt and black streaks from your tires.
- Plastic Polish/Protectant: Restores the shine and protects your bike’s plastic components.
- Metal Polish: For any unpainted metal parts like spokes or exhaust headers.
Cleaning Tools
- Buckets (Two are best): One for soapy water, one for rinsing your wash mitt. This prevents spreading dirt back onto the bike.
- Wash Mitts or Sponges: Soft, non-abrasive options are ideal.
- Brushes: A variety of brushes will be helpful:
- Soft-bristled brush for general washing.
- Stiff-bristled brush for stubborn grime on tires and footpegs.
- Detailing brushes (like old toothbrushes) for tight spots.
- Wheel brushes for getting into rims and spokes.
- Hose with Adjustable Nozzle: For rinsing.
- Pressure Washer (Optional, use with caution): If you use one, keep the nozzle far away from bearings and electrical components.
- Microfiber Towels: For drying and polishing. Avoid old rags that can scratch paint.
- Air Compressor (Optional): Great for blowing water out of nooks and crannies.
- Chain Lube: For after cleaning and lubricating the chain.
Protecting Sensitive Parts
- Plastic Bags or Wrap: To cover electrical components like the airbox, CDI unit, and exhaust packing if you’re using high-pressure water.
Preparing Your Workspace and Bike
A good setup makes all the difference. Find a shaded area if possible, as direct sunlight can cause soap and water to dry too quickly, leaving streaks.
Setting Up Your Cleaning Station
- Find a Suitable Location: A driveway or wash bay is ideal. Ensure you have good drainage.
- Gather Everything: Have all your supplies within easy reach before you start.
- Protect Your Surroundings: If you’re using harsh degreasers, consider placing down cardboard or a tarp to protect your driveway surface.
Pre-Rinse: Removing Loose Dirt
Start by giving the entire bike a good rinse. This removes loose dirt and mud, making the washing process smoother and reducing the risk of scratching the paint or plastics.
- Use a low-pressure spray from your hose.
- Work from the top of the bike downwards.
- Pay attention to wheel wells and under the fenders where dirt tends to accumulate.
This initial rinse is crucial for removing the bulk of the debris, making the next steps more effective.
The Washing Process: Step-by-Step Dirt Bike Cleaning
Now that you’re prepared, let’s get down to the actual washing.
Step 1: Pre-Wash Degreasing (The Grime Fighters)
This is where you tackle the really tough stuff, especially on the engine and drivetrain.
Cleaning Motorcycle Engine Components
- Apply Degreaser: Spray a bike-specific degreaser onto the engine cases, frame rails, and any other areas with heavy grease or oil buildup. Avoid spraying degreaser directly onto electrical connectors or the radiator if possible.
- Let it Sit: Allow the degreaser to dwell for a few minutes as per the product instructions. This gives it time to break down the grime.
- Agitate Stubborn Areas: Use your stiff-bristled brushes to agitate any particularly greasy spots. For how to clean motorcycle engine components effectively, focus on getting into crevices.
- Rinse Thoroughly: Rinse the degreased areas with low-pressure water. Ensure all degreaser is removed, as residual amounts can damage seals or finishes.
Removing Mud from Dirt Bike Areas
- Focus on Mud Caked On: For areas heavily caked with mud, like the swingarm, frame, and wheel spokes, you might need a bit more persuasion.
- Soft Brush Agitation: Use a softer brush with your wash soap to gently scrub away the mud.
- Pressure Washer Caution: If using a pressure washer, keep the nozzle at a safe distance (at least 2-3 feet) and use a wider fan setting. Never blast water directly at bearings (wheel bearings, swingarm bearings, linkage bearings), engine seals, the radiator, or electrical components.
Step 2: The Main Wash (Soapy Suds)
Now it’s time for the main event – washing the entire bike with soap and water.
Washing Motorcycle Plastics and Bodywork
- Fill Your Buckets: One bucket with clean water for rinsing your wash mitt, and another with soapy water.
- Start from the Top: Dip your wash mitt into the soapy water and start washing from the highest point of the bike (fenders, tank, seat) and work your way down.
- Gentle Washing: Use light pressure and a consistent motion. Rinse your mitt frequently in the clean water bucket to avoid transferring grit back onto the bike.
- Tackling Stubborn Dirt: For dirt that’s not coming off easily, use a wash brush with your soapy water.
Cleaning Motorcycle Frame and Other Components
- Don’t Forget the Frame: The motorcycle frame collects a lot of dirt. Use your wash mitt and brushes to clean it thoroughly, paying attention to welds and junctions.
- Wheels and Tires: Use a dedicated wheel brush and tire cleaner for the wheels and tires. These areas often have the most stubborn grime.
- Exhaust Pipe: Clean the exhaust pipe with your soapy wash mitt. For stubborn discoloration or bluing, you might need a specific metal polish later.
Step 3: Rinsing Off the Suds
After the soapy wash, it’s time to rinse everything off.
- Use Low Pressure: Again, use your hose on a low-pressure setting.
- Work from Top to Bottom: Rinse thoroughly from the top of the bike downwards, ensuring all soap residue is gone.
- Check for Missed Spots: As you rinse, look for any areas you might have missed and give them a quick scrub.
Drying Your Dirt Bike: Preventing Water Spots and Rust
Drying is a critical step that often gets overlooked. Improper drying can lead to water spots and, worse, rust on exposed metal parts.
Towel Drying
- Use Microfiber Towels: These are highly absorbent and gentle on your bike’s finish.
- Blot and Wipe: Gently blot water from surfaces. For larger areas, wipe in one direction.
- Multiple Towels: You’ll likely need several towels to dry the entire bike effectively.
Using an Air Compressor
- Blast Away Water: An air compressor is excellent for blowing water out of hard-to-reach places like chain guards, suspension linkages, electrical connectors, and bolt heads. This helps prevent rust and corrosion.
- Focus on Bearings and Seals: Pay special attention to blowing water away from any bearing surfaces or seals.
Detailing and Protection: The Final Touches
This is where you truly elevate your dirt bike cleaning.
Washing Motorcycle Plastics and Restoring Shine
- Plastic Polish: Apply a plastic polish or protectant to all the plastic parts. This will restore their color, add a UV protectant, and give them a nice shine.
- Buffing: Use a clean microfiber towel to buff the plastic polish into the plastics.
Cleaning and Protecting Metal Parts
- Metal Polish: For any unpainted metal parts like exhaust headers, spokes, or engine covers, use a metal polish. Apply a small amount to a cloth and rub onto the metal.
- Buff to a Shine: Buff the metal polish off with a clean cloth to reveal a shiny finish.
Chain Maintenance
- Lubricate the Chain: After drying the chain thoroughly, apply a quality chain lubricant. Spin the rear wheel slowly while applying the lube to the inside of the chain rollers.
- Wipe Off Excess: Wipe off any excess chain lube. Too much lube attracts dirt.
Advanced Dirt Bike Washing Techniques and Tips
Here are some more tips to refine your dirt bike cleaning routine.
Pressure Washing Dirt Bike Safely
If you opt for pressure washing dirt bike components, remember these golden rules:
- No Direct Blasting: Never aim the high-pressure stream directly at bearings, seals, radiator fins, electrical connections, or the air filter.
- Wide Fan Setting: Use a wide fan spray pattern, not a pinpoint jet.
- Maintain Distance: Keep the nozzle at least 2-3 feet away from the bike.
- Pre-Rinse is Key: A good pre-rinse with a regular hose reduces the need for aggressive pressure washing.
Motorcycle Washing Tips for Different Components
- Wheels: Use specialized wheel brushes and cleaners. For the spokes, a narrow brush is best.
- Engine: As detailed earlier, use degreaser and brushes carefully.
- Seat: Most dirt bike seats can be wiped down with a damp cloth and soapy water. Avoid soaking the seat or using harsh chemicals that can degrade the vinyl.
- Radiator: Gently rinse the radiator fins. Bent fins can be carefully straightened with a fin comb.
What is the Best Way to Wash a Dirt Bike?
The best way to wash a dirt bike is a methodical, top-to-bottom approach that prioritizes the protection of sensitive components. It involves a thorough pre-rinse, careful degreasing of specific areas, a gentle wash with appropriate cleaners and brushes, meticulous rinsing, and thorough drying, followed by protection of plastics and metal parts.
Dirt Bike Detailing for Longevity
Regular dirt bike detailing isn’t just about looks; it’s about preserving your investment. A clean bike allows you to:
- Inspect for Damage: Easily spot cracks, leaks, or loose parts.
- Prevent Corrosion: Remove salt, mud, and moisture that can lead to rust.
- Maintain Performance: Clean drivetrains and engines operate more efficiently.
Common Mistakes to Avoid
- Using Household Cleaners: These can be too harsh and damage paint, plastics, or rubber components.
- High-Pressure Blasting of Bearings: This is a surefire way to force water and dirt into bearing seals, leading to premature failure.
- Not Drying Properly: Leads to water spots and potential rust.
- Forgetting About the Underside: The underside of the bike, including the swingarm and linkages, collects a lot of grit.
Dirt Bike Washing Frequency
The frequency of washing depends on how often you ride and the conditions you ride in.
- After Every Muddy Ride: It’s highly recommended to give your bike a rinse and clean after any ride in the mud or wet conditions.
- Regular Cleaning: Even after dry rides, a quick wash every few rides helps maintain your bike.
Frequently Asked Questions (FAQ) about Dirt Bike Cleaning
Q1: Can I use dish soap to wash my dirt bike?
A1: While dish soap can cut through grease, it’s generally too harsh for your dirt bike’s finish and can strip protective waxes or coatings. It’s better to use a dedicated motorcycle wash soap.
Q2: How often should I wash my dirt bike?
A2: It’s best to wash your dirt bike after every muddy or wet ride. For dry conditions, a wash every few rides is usually sufficient to keep it in good condition.
Q3: What’s the best way to clean a dirty motorcycle engine?
A3: Use a degreaser specifically designed for motorcycles. Apply it to the engine, let it sit for a few minutes, and then use brushes to agitate stubborn grime before rinsing carefully. Avoid spraying directly on electrical components.
Q4: Is pressure washing a dirt bike bad?
A4: Pressure washing can be bad if done incorrectly. Never use high pressure directly on bearings, seals, electrical components, or the radiator. Always use a wide fan setting and keep a safe distance. A regular hose is often sufficient for most cleaning needs.
Q5: How do I remove stubborn mud from my dirt bike?
A5: For stubborn mud, pre-soak the area with water, then use a soft brush and soapy water to gently scrub it away. A pressure washer on a low setting and wide fan can also help, but be cautious around sensitive parts.
Q6: What about cleaning the motorcycle frame?
A6: The motorcycle frame should be cleaned thoroughly using your wash mitt and soapy water. Use brushes to get into crevices and ensure all mud and grime are removed. This is a good time to inspect the frame for any damage.
By following these steps and tips, you’ll keep your dirt bike looking great and performing at its best, ensuring many more miles of off-road enjoyment. Happy cleaning!