
If your bike brakes are making a squeaking sound, it’s most likely due to dirt or debris on the braking surfaces, worn-out brake pads, or issues with brake pad alignment. This guide will help you figure out why your bicycle brake noise is happening and how to fix it.
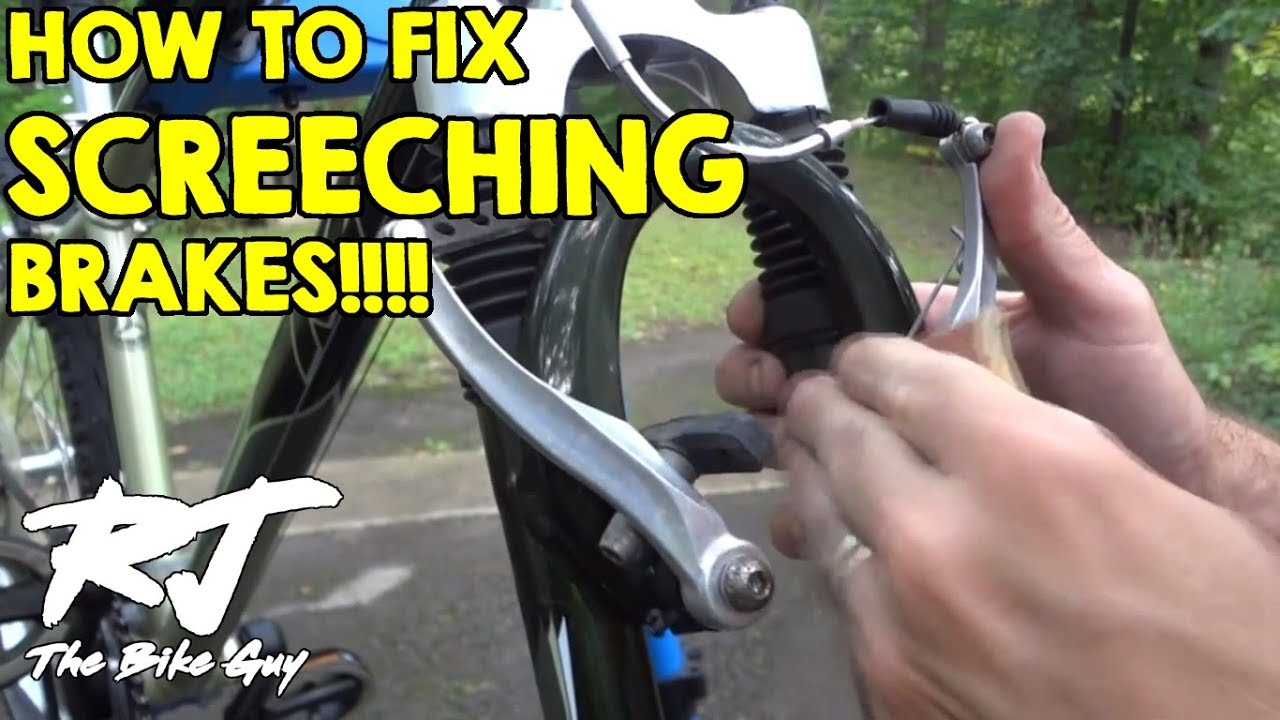
Image Source: i.ytimg.com
Deciphering Bicycle Brake Noise: A Comprehensive Guide
That irritating squeal or groan coming from your bike brakes can be more than just annoying; it can also be a sign that something isn’t quite right with your braking system. Whether you’re dealing with rim brake squeaking or disc brake noise, the causes are often similar, but the fixes might differ slightly. Let’s dive into why your bike brakes are noisy and how to silence them.
The Usual Suspects: Common Brake Squeal Causes
Several factors can contribute to noisy bike brakes. It’s rarely a single issue, but rather a combination of small problems that create a symphony of squeaks.
1. Contamination: The Silent Saboteur
One of the most frequent culprits behind brake squeal is contamination. This means something foreign has gotten onto your brake pads and/or rotors (for disc brakes) or rims (for rim brakes).
- Brake Pad Contamination: This is a big one. Oils, grease, and even certain cleaning solvents can get onto your brake pads. If you’ve ever lubed your chain too liberally, or if your bike has been exposed to greasy workshop conditions, this could be the source. Contaminated pads often feel slick and can lose their stopping power.
- Rotor Contamination (Disc Brakes): Similar to pads, brake rotors can also become contaminated with oils or grease. This is especially common if you’ve been working on your bike and accidentally touched the rotor with greasy fingers.
- Rim Contamination (Rim Brakes): For rim brakes, the braking surface on the wheel rim itself can get dirty. Road grime, oil from the chain, or even residue from tire sealant can transfer to the rim and cause noise.
2. Brake Pad Wear: The Obvious Indicator
Brake pads, like tires, wear out over time. When they get too thin, they can start to make noise.
- Thin Pads: Most brake pads have a wear indicator line. If your pads are worn down to this line, or even beyond it, they’ll likely squeak. Worn pads lose their effectiveness, so replacing them is crucial for safety.
- Uneven Wear: Sometimes, brake pads can wear unevenly. This can happen if the brake caliper isn’t properly aligned.
3. Alignment and Adjustment: The Precision Factor
How your brake pads meet the rotor or rim is critical for smooth, quiet operation.
- Caliper Misalignment (Disc Brakes): If the brake caliper isn’t perfectly centered over the rotor, the pads might not make even contact. This can cause vibrations that manifest as squealing.
- Pad Angle (Rim Brakes): For rim brakes, the angle at which the brake pad hits the rim is important. The toe-in, where the front of the pad hits the rim slightly before the rear, can help reduce squeal. If the pads are hitting square or are angled incorrectly, noise can occur.
- Brake Lever Feel: If your brake levers feel spongy or require excessive force, it could indicate that your brake cables need adjustment or hydraulic fluid needs bleeding. This isn’t always a direct cause of squealing but can be related to overall braking performance.
4. Glazing: The Hardened Surface
When brake pads and rotors (or rims) get very hot and are repeatedly applied with firm pressure without much variation, they can develop a hard, shiny surface. This is called glazing.
- Glazed Brake Pads: Glazed pads lose their friction material’s ability to grip effectively. They often feel hard to the touch and are less effective at stopping your bike, while producing a distinct squeal.
- Glazed Rotors/Rims: The braking surface on the rotor or rim can also become glazed, leading to similar problems.
5. Wet Brake Noise: The Temporary Annoyance
It’s very common for bike brakes to squeak when wet.
- Water and Debris: Water on the braking surfaces washes away any lubricating film of air and grit that might normally be present. This allows for more direct contact between the pad and rotor/rim, leading to increased friction and vibration, which can result in squealing.
- Temporary Nature: This type of wet brake noise usually goes away once the brakes dry out. However, if the squeal persists after drying, it might indicate an underlying issue like contamination or worn pads.
Troubleshooting Steps for Noisy Bike Brakes
Let’s get down to fixing that squeak. We’ll cover both rim brakes and disc brakes.
Step 1: Identify the Type of Brakes You Have
- Rim Brakes: These use brake pads that squeeze against the rim of your wheel. Common types include V-brakes, cantilever brakes, and caliper brakes.
- Disc Brakes: These use brake pads that squeeze against a metal rotor attached to the wheel hub.
Step 2: Initial Inspection and Cleaning
Before you start taking things apart, a good visual inspection and clean can often solve the problem.
For all Brake Types:
- Visual Check: Look at your brake pads. Are they worn down? Do they look dirty or shiny? For disc brakes, inspect the rotors for any oily residue or discoloration. For rim brakes, check the rims for dirt or debris.
- Clean the Braking Surfaces:
- Disc Brakes:
- Rotors: Use a dedicated disc brake cleaner or isopropyl alcohol (rubbing alcohol) on a clean cloth. Wipe down both sides of the rotor thoroughly. Avoid touching the rotor with your bare hands afterward.
- Brake Pads: If you suspect pad contamination, you can try cleaning them. For resin pads, a gentle wipe with isopropyl alcohol might help. For sintered (metallic) pads, you can try lightly sanding the surface with fine-grit sandpaper (around 120-220 grit) to remove the contaminated outer layer. Important: After cleaning or sanding, always re-install the pads and bed them in again (see below).
- Rim Brakes:
- Rims: Clean the rim braking surface with a degreaser and a clean cloth. Then wipe with a clean, damp cloth to remove degreaser residue, and finally dry thoroughly.
- Brake Pads: If the pads look dirty or have debris embedded, you can often remove them and clean them. Use a wire brush or fine-grit sandpaper to gently clean the surface and remove any embedded grit.
- Disc Brakes:
Step 3: Checking and Adjusting Brake Pad Alignment
Proper alignment ensures the pads make even contact with the rotor or rim.
For Disc Brakes:
- Caliper Adjustment:
- Loosen Caliper Bolts: Slightly loosen the bolts that attach the brake caliper to the frame or fork.
- Squeeze Brake Lever: Squeeze the brake lever firmly and hold it. This action should naturally center the caliper over the rotor.
- Tighten Caliper Bolts: While still holding the lever, carefully tighten the caliper mounting bolts one at a time. Tighten them gradually, alternating between bolts, until they are snug.
- Release Lever and Spin Wheel: Release the brake lever. The wheel should spin freely without rubbing the brake pads. If you still hear rubbing, repeat the adjustment process.
- Fine-Tuning: Sometimes, you might need to make very small adjustments to the caliper position by slightly loosening the bolts and nudging the caliper by hand to eliminate any rotor rub.
For Rim Brakes:
- Pad Angle (Toe-In): This is crucial for preventing rim brake squeaking. The ideal setup is for the front of the brake pad to contact the rim a fraction of a second before the rear of the pad.
- Inspect Pad Contact: Look at how the pad hits the rim. It should contact the braking track, not the tire or spokes.
- Adjusting Toe-In: Most brake pads have a mounting bolt that allows for some adjustment.
- Loosen the pad mounting bolt slightly.
- Use a thin shim (often included with new brake pads or available from bike shops) between the rear of the pad and the rim. Alternatively, you can carefully try to angle the pad.
- Alternatively, some pads have adjustable mounting arms.
- Tighten the bolt once the correct toe-in is achieved.
- Check Rim Clearance: Ensure the pads are not hitting the spokes or tire.
- Check Vertical Alignment: The pads should also be aligned vertically so they hit the rim squarely in the middle of the braking track.
Step 4: Checking for Brake Pad Wear
This is a critical safety check.
- Disc Brake Pads:
- Remove the brake pads from the caliper.
- Examine the thickness of the friction material. If it’s less than 1mm (about the thickness of a credit card) or if you can see a wear indicator line, it’s time to replace the pads.
- Rim Brake Pads:
- Most rim brake pads have small grooves or lines on them. If these are no longer visible, the pads are worn out.
- Alternatively, measure the thickness of the pad material. If it’s very thin or worn down to the metal backing, they need replacing.
Step 5: Bedding In New Brake Pads (or Cleaned Pads)
This process, often called “bedding in,” transfers a thin layer of pad material to the rotor or rim, creating a more uniform and effective braking surface. This is essential for both new pads and pads that have been cleaned or sanded.
For Disc Brakes:
- Find a Safe Area: Go to a gentle slope or flat, open area where you can ride safely.
- Accelerate: Ride your bike to a moderate speed (e.g., 10-15 mph).
- Brake Firmly but Not to a Stop: Apply the brake firmly, slowing down to about half your initial speed. Do not lock up the wheel or come to a complete stop.
- Repeat: Release the brake and accelerate back to your initial speed. Repeat this process 10-20 times for each brake.
- Feel the Difference: You should notice the braking power improving and any initial squealing reducing as you go through the process.
For Rim Brakes:
- Similar Process: The principle is the same. Ride at a moderate speed.
- Apply Brakes: Apply the brakes firmly to slow down.
- Repeat: Repeat this several times. Bedding in rim brakes is often less dramatic than with disc brakes, but it still helps improve performance and reduce noise.
Step 6: Addressing Glazing
If you suspect your brake pads or rotors/rims are glazed, here’s what to do:
- Sanding: For glazed pads, you can try sanding them with fine-grit sandpaper (120-220 grit) to remove the hard outer layer. Clean the surface afterward.
- Rotor/Rim Cleaning: For glazed rotors or rims, a thorough cleaning with isopropyl alcohol or a dedicated cleaner might help.
- Replacement: If sanding or cleaning doesn’t resolve the issue, it’s often best to replace the brake pads and, in some cases, the rotors or clean the rims thoroughly.
Step 7: Hydraulic Disc Brake Specifics
If you have hydraulic disc brakes and are experiencing persistent noise or a spongy lever, you might need to consider:
- Brake Bleeding: Over time, air can get into the hydraulic fluid lines. Bleeding the brakes removes this air and ensures optimal braking performance. This is a more complex procedure and might be best left to a bike shop if you’re not comfortable with it.
- Fluid Levels: Check if the fluid level is low. If it is, there might be a leak.
Table of Common Noisy Brake Issues and Solutions
| Problem Category | Specific Issue | Disc Brakes Solution | Rim Brakes Solution |
|---|---|---|---|
| Contamination | Oily or greasy pads/rotors/rims | Clean rotors with disc brake cleaner/alcohol. Clean pads by light sanding (sintered) or isopropyl alcohol (resin). | Clean rims with degreaser. Clean pads with wire brush or sandpaper. |
| Brake Pad Wear | Worn-out pads | Replace brake pads when friction material is <1mm or wear indicator is visible. | Replace brake pads when grooves/lines disappear or material is very thin. |
| Alignment & Adjustment | Caliper misaligned | Loosen caliper bolts, squeeze lever, tighten bolts while holding lever. Adjust for slight rotor rub. | Adjust pad angle (toe-in) for smooth contact. Ensure pads hit rim squarely and don’t rub spokes/tires. |
| Surface Issues | Glazed brake pads or rotors/rims | Sand pads lightly. Clean rotors/rims thoroughly with alcohol. Consider pad/rotor replacement if persistent. | Sand pads lightly. Clean rims thoroughly. Consider pad replacement if persistent. |
| Environmental | Wet brake noise | Usually temporary. Allow to dry. If persistent, investigate contamination or pad wear. | Usually temporary. Allow to dry. If persistent, investigate contamination or pad wear. |
| Hydraulic System | Air in lines/low fluid | Consider bleeding hydraulic brakes. Check for leaks. | Not applicable. |
Why Are My Bike Brakes Squeaking After a Ride?
If your brakes start squeaking only after a ride, it could be due to heat buildup causing the pads to glaze slightly or a slight shift in alignment due to vibrations.
- Heat Expansion: Components can expand slightly with heat, altering the alignment.
- Vibrational Settling: Over a ride, components can settle, causing a slight change in pad contact.
The troubleshooting steps outlined above, especially checking alignment and cleaning, should address this.
What is Brake Pad Contamination?
Brake pad contamination refers to any foreign substance, such as oil, grease, lubricants, or certain solvents, that gets onto the friction surface of your brake pads. This contamination reduces the friction between the pad and the rotor or rim, leading to decreased stopping power and often causing squealing.
Can I Ride My Bike With Squeaky Brakes?
While a slight squeak, especially in wet conditions, might not be immediately dangerous, persistent squealing is a warning sign. Squeaky brakes can indicate:
- Reduced Stopping Power: Worn or contaminated pads won’t stop you as effectively, increasing your stopping distance.
- Damage to Components: Grinding noises or severely contaminated pads can damage your rotors or rims, leading to more expensive repairs.
It’s always best to address noisy bike brakes promptly to ensure your safety and the longevity of your components.
Conclusion: Silencing the Squeal
Bicycle brake noise can be a frustrating issue, but by systematically troubleshooting the common causes – contamination, wear, and alignment – you can often silence that squeal. Regular maintenance, including cleaning and inspecting your brakes, will go a long way in keeping them performing at their best and ensuring a safe, quiet ride. If you’ve tried these steps and the noise persists, don’t hesitate to take your bike to a qualified mechanic.
Frequently Asked Questions (FAQ)
How often should I check my bike brakes?
It’s a good idea to give your brakes a quick visual check before every ride, looking for obvious issues like loose components or heavily worn pads. A more thorough inspection and cleaning should be done every few months or after riding in wet or dirty conditions.
My disc brakes are new, why are they squeaking?
New disc brake pads and rotors often require a “bedding-in” process to perform optimally and quietly. If they are squeaking, follow the bedding-in procedure outlined in this guide. Contamination during installation can also be a cause.
Can I use household cleaners on my bike brakes?
It’s best to use specialized bike brake cleaners or isopropyl alcohol. Harsh household cleaners can sometimes contain chemicals that damage brake components or leave residue, leading to further problems.
Do I need to replace rotors when I replace brake pads?
You typically only need to replace disc brake rotors if they are significantly worn (below a minimum thickness, usually stamped on the rotor), warped, or if they have been badly contaminated and cleaning doesn’t resolve issues. Usually, just replacing the pads is sufficient.
What if my rim brakes squeak even when dry?
If your rim brakes squeak even in dry conditions, it strongly suggests contamination or worn/glazed pads. Thoroughly clean your rims and pads, check for glazing, and consider replacing the pads if they show signs of wear. Ensuring correct pad toe-in is also crucial.